Getting started: Hosted
Subscribe, and we run MyAgentOS for you in the cloud. One email brings a single-use set-up link; you choose a password and connect your own AI, and your private instance is ready.
The hosted plan is the one where the setting up is done for you. You subscribe on the website, a private server is built for you, and a single email arrives with a link to finish setup. There is no software to install and nothing to run: your instance lives at its own address and stays on around the clock.
What you end up with is your own locked front door. You set the password, you connect your own AI account, and your credentials are stored only on your private workspace volume: the setup screen says so in as many words, "Your credentials are stored only on your private workspace volume. They are never shared."
Who it is for: anyone who wants MyAgentOS running in the cloud without local setup, on their own private instance. If you would rather run it on your own Mac, see Getting started: Mac app instead.
Watch first: getting-started-hosted.mp4 (captions toggleable in your player, or load getting-started-hosted.srt). The screen is a real recording of the product and the live website; the narration is an AI-generated voice.
1. Subscribe
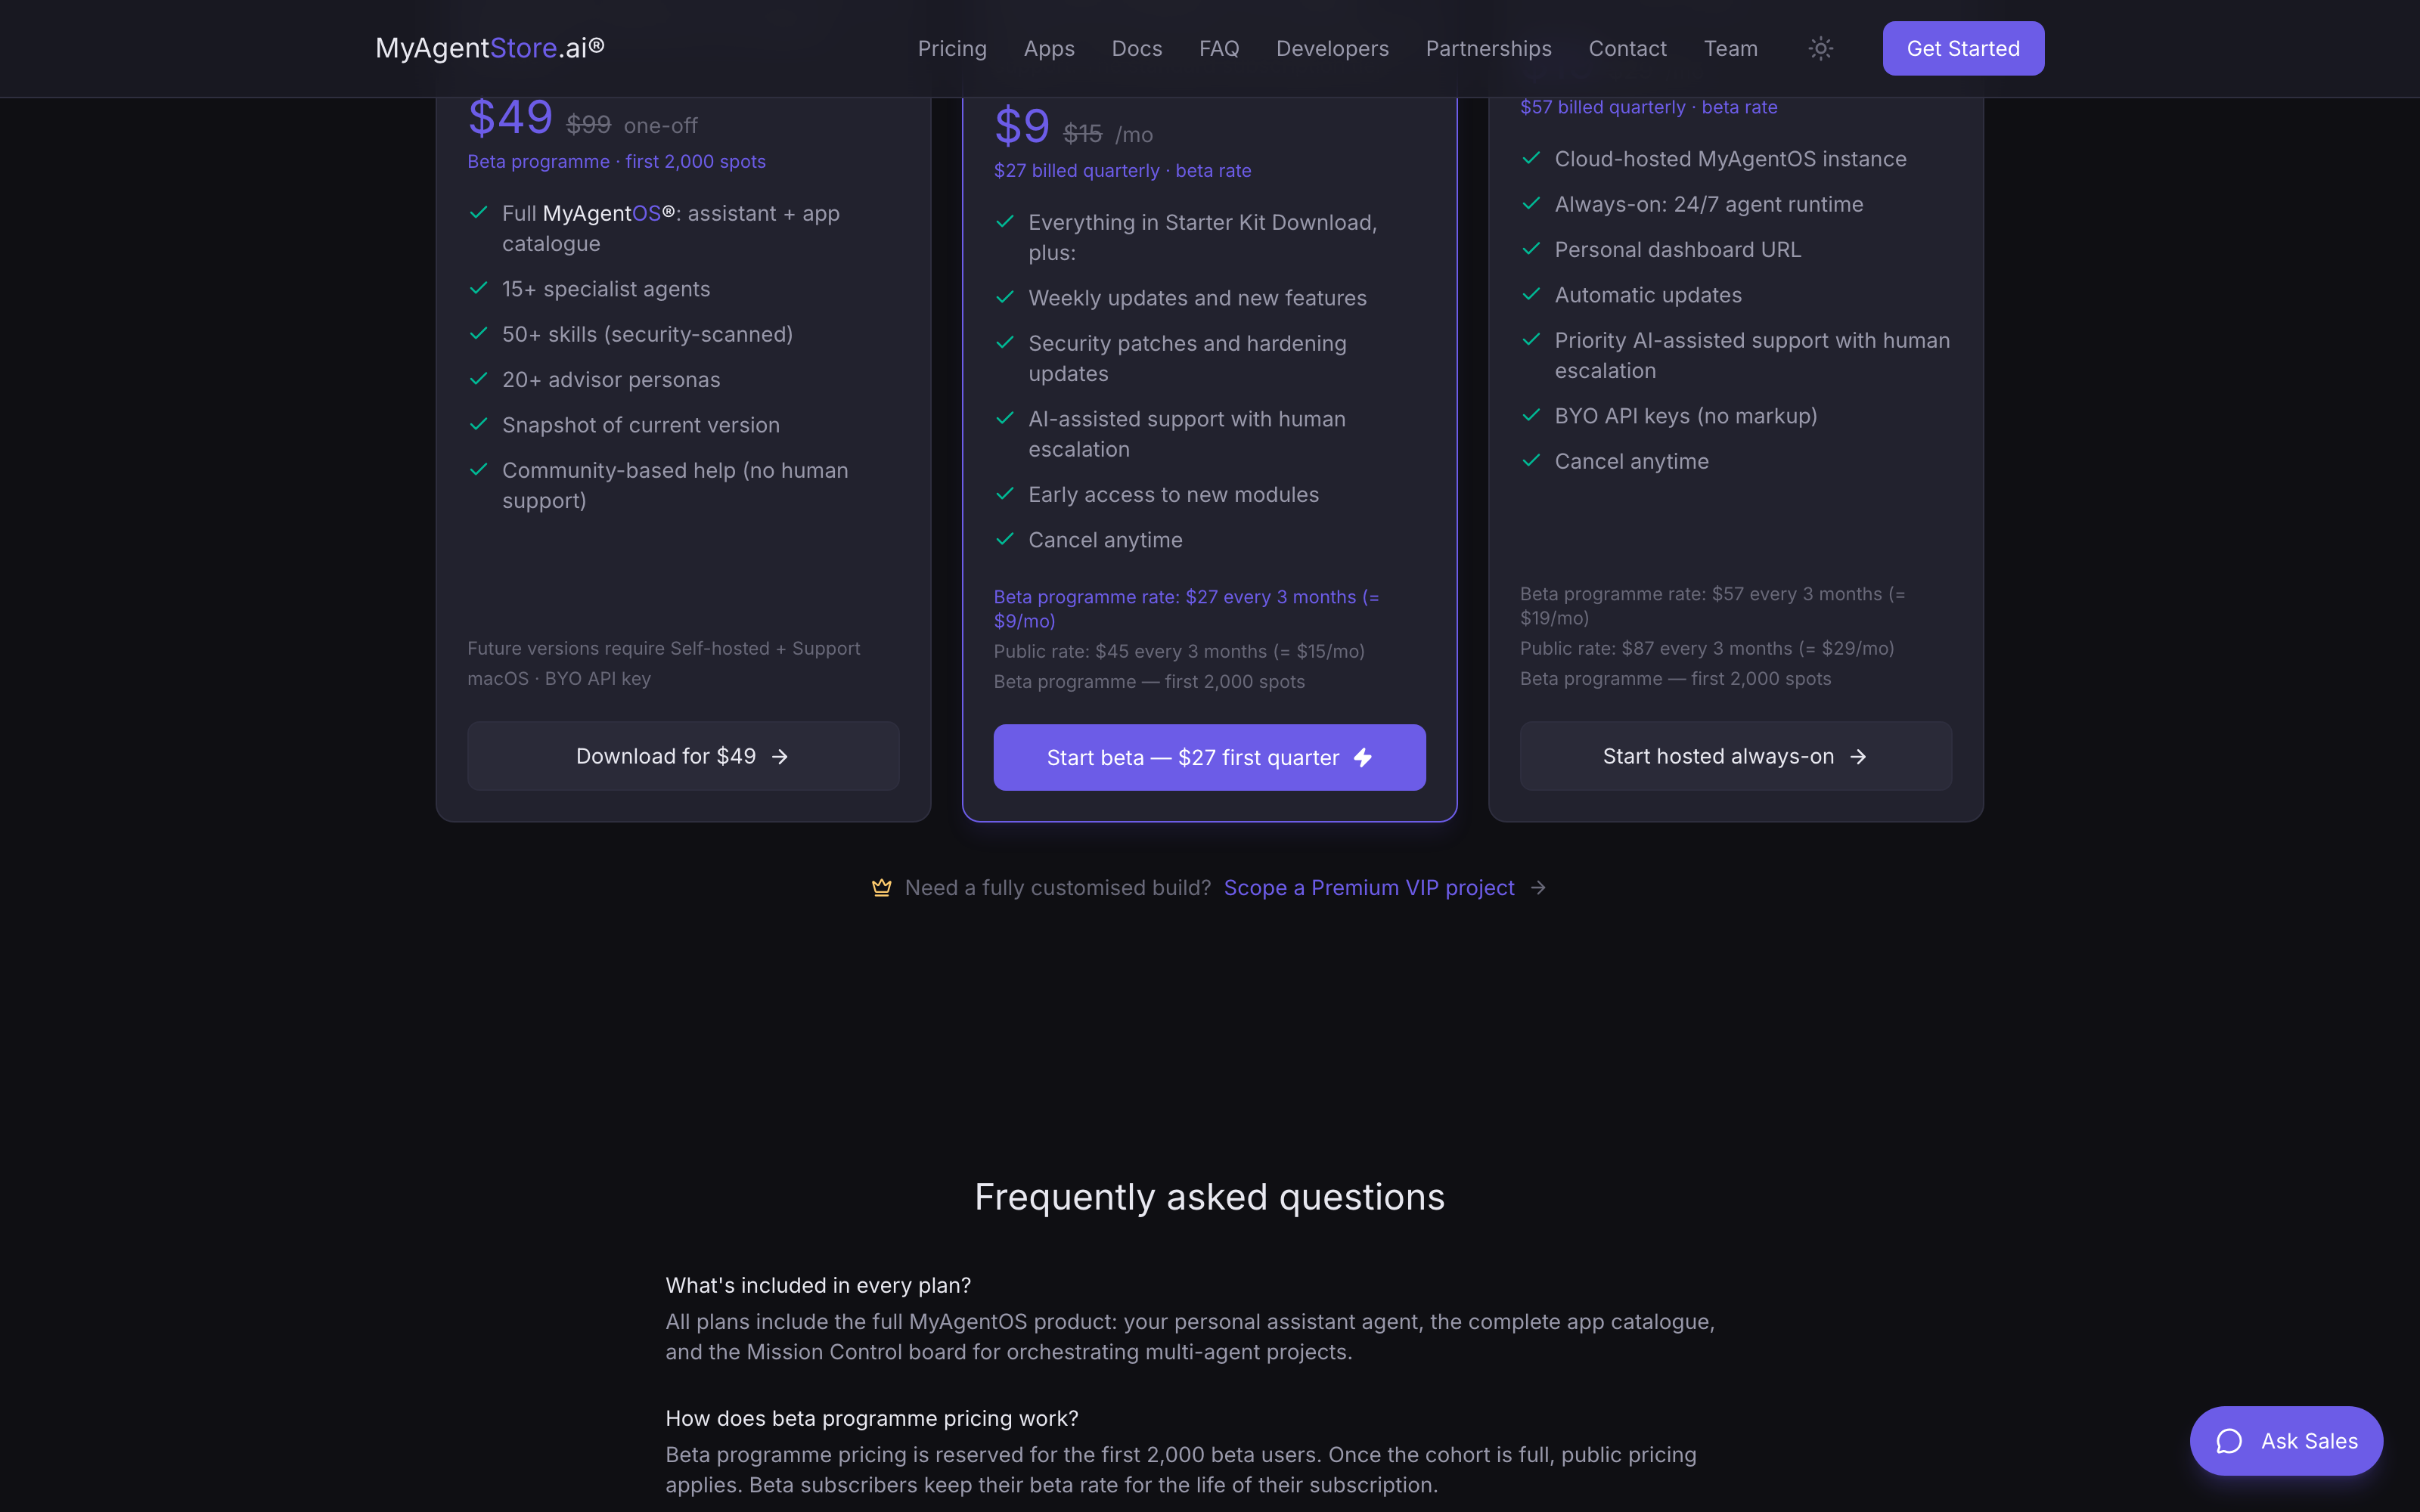
On the pricing page, the hosted plan is the Subscription (Cloud-hosted) card: "We run MyAgentOS for you in the cloud, 24/7. Zero local setup." Select Start hosted always-on and you land on the hosted checkout.
The checkout asks for two things: your Email address and a subdomain (the
first part of your dashboard address, ending .hosted.myagentstore.ai). Select
Continue to payment and enter your card details in the secure Stripe form.
You bring your own AI API key later, and usage is never marked up.
Nothing is set up until payment succeeds. Once it does, your private server is built and readiness-checked automatically, then your welcome email is sent.
2. Your set-up email
When your instance is ready, one email arrives. Its subject begins "Set up your
MyAgentOS" and tells you your instance is ready. It confirms where your dashboard lives
(https://<your-subdomain>.hosted.myagentstore.ai) and carries a single Set up
your MyAgentOS button.
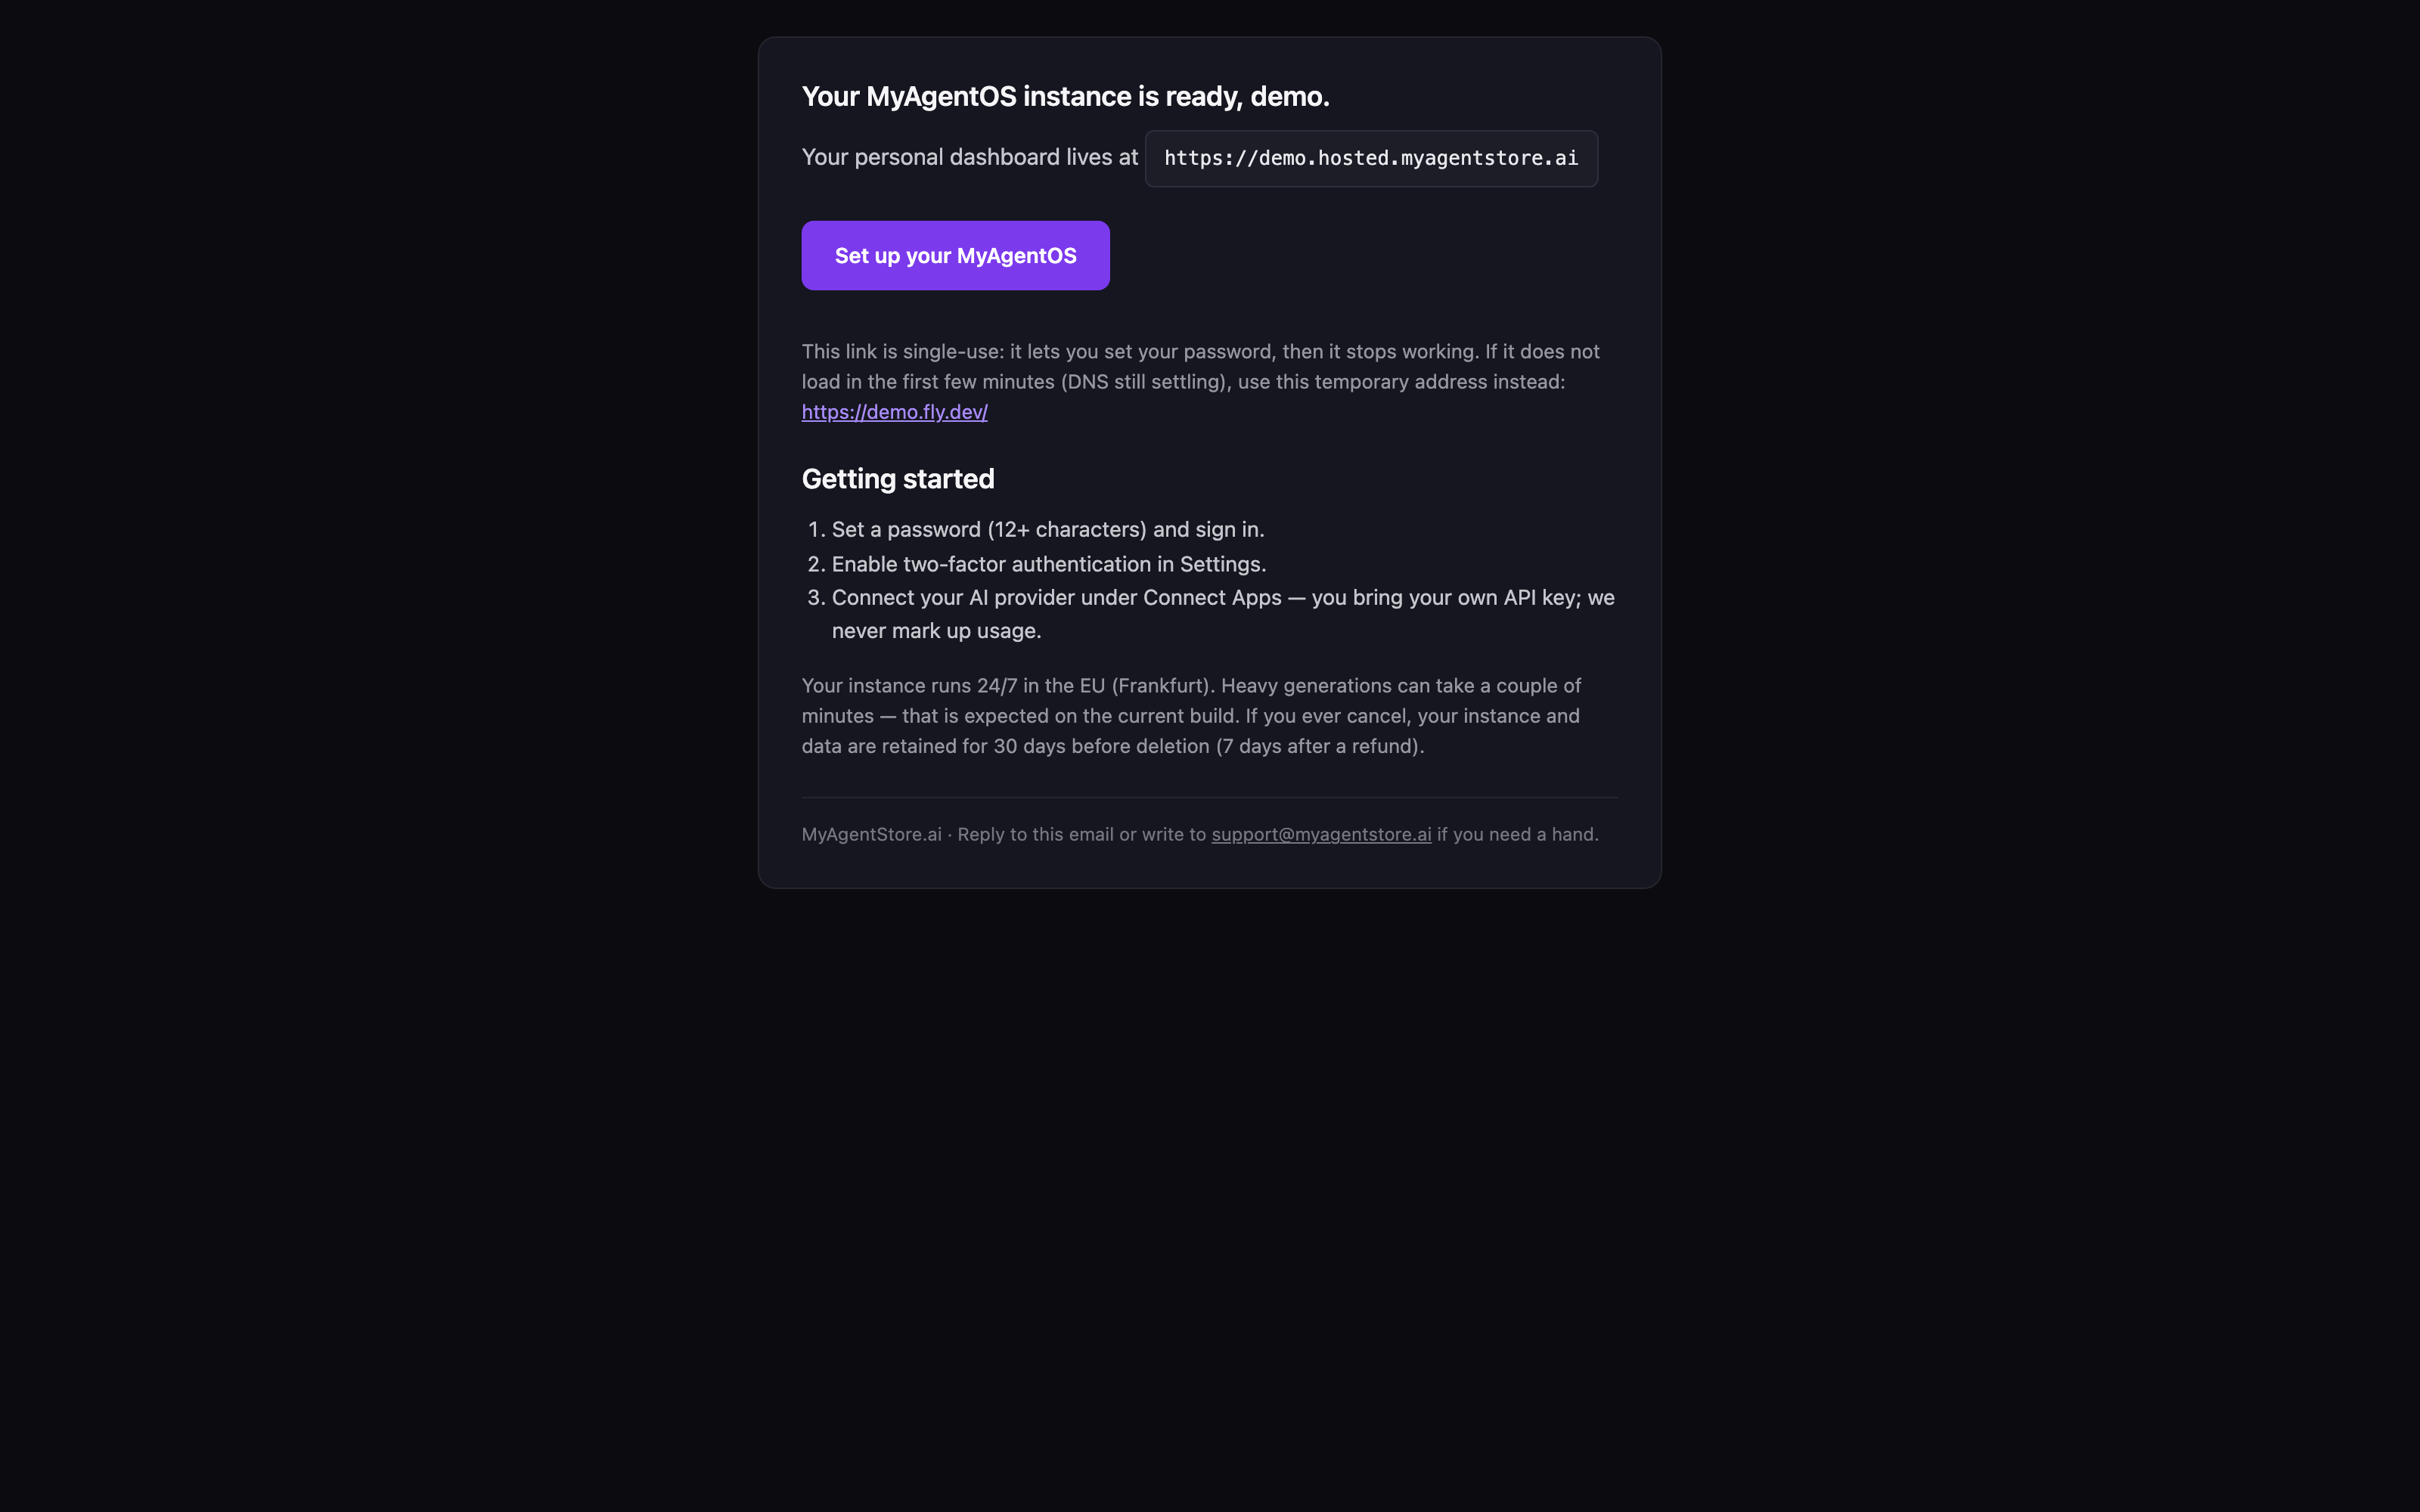
That button is a single-use link: as the email puts it, "it lets you set your password, then it stops working." The email also lists the three first steps: set a password, enable two-factor authentication, and connect your AI provider.
3. Claim your instance
Open the link and you reach the claim screen: "Welcome. Set a password to finish setting up your account." Choose a password of at least 12 characters, confirm it, and select Create account.
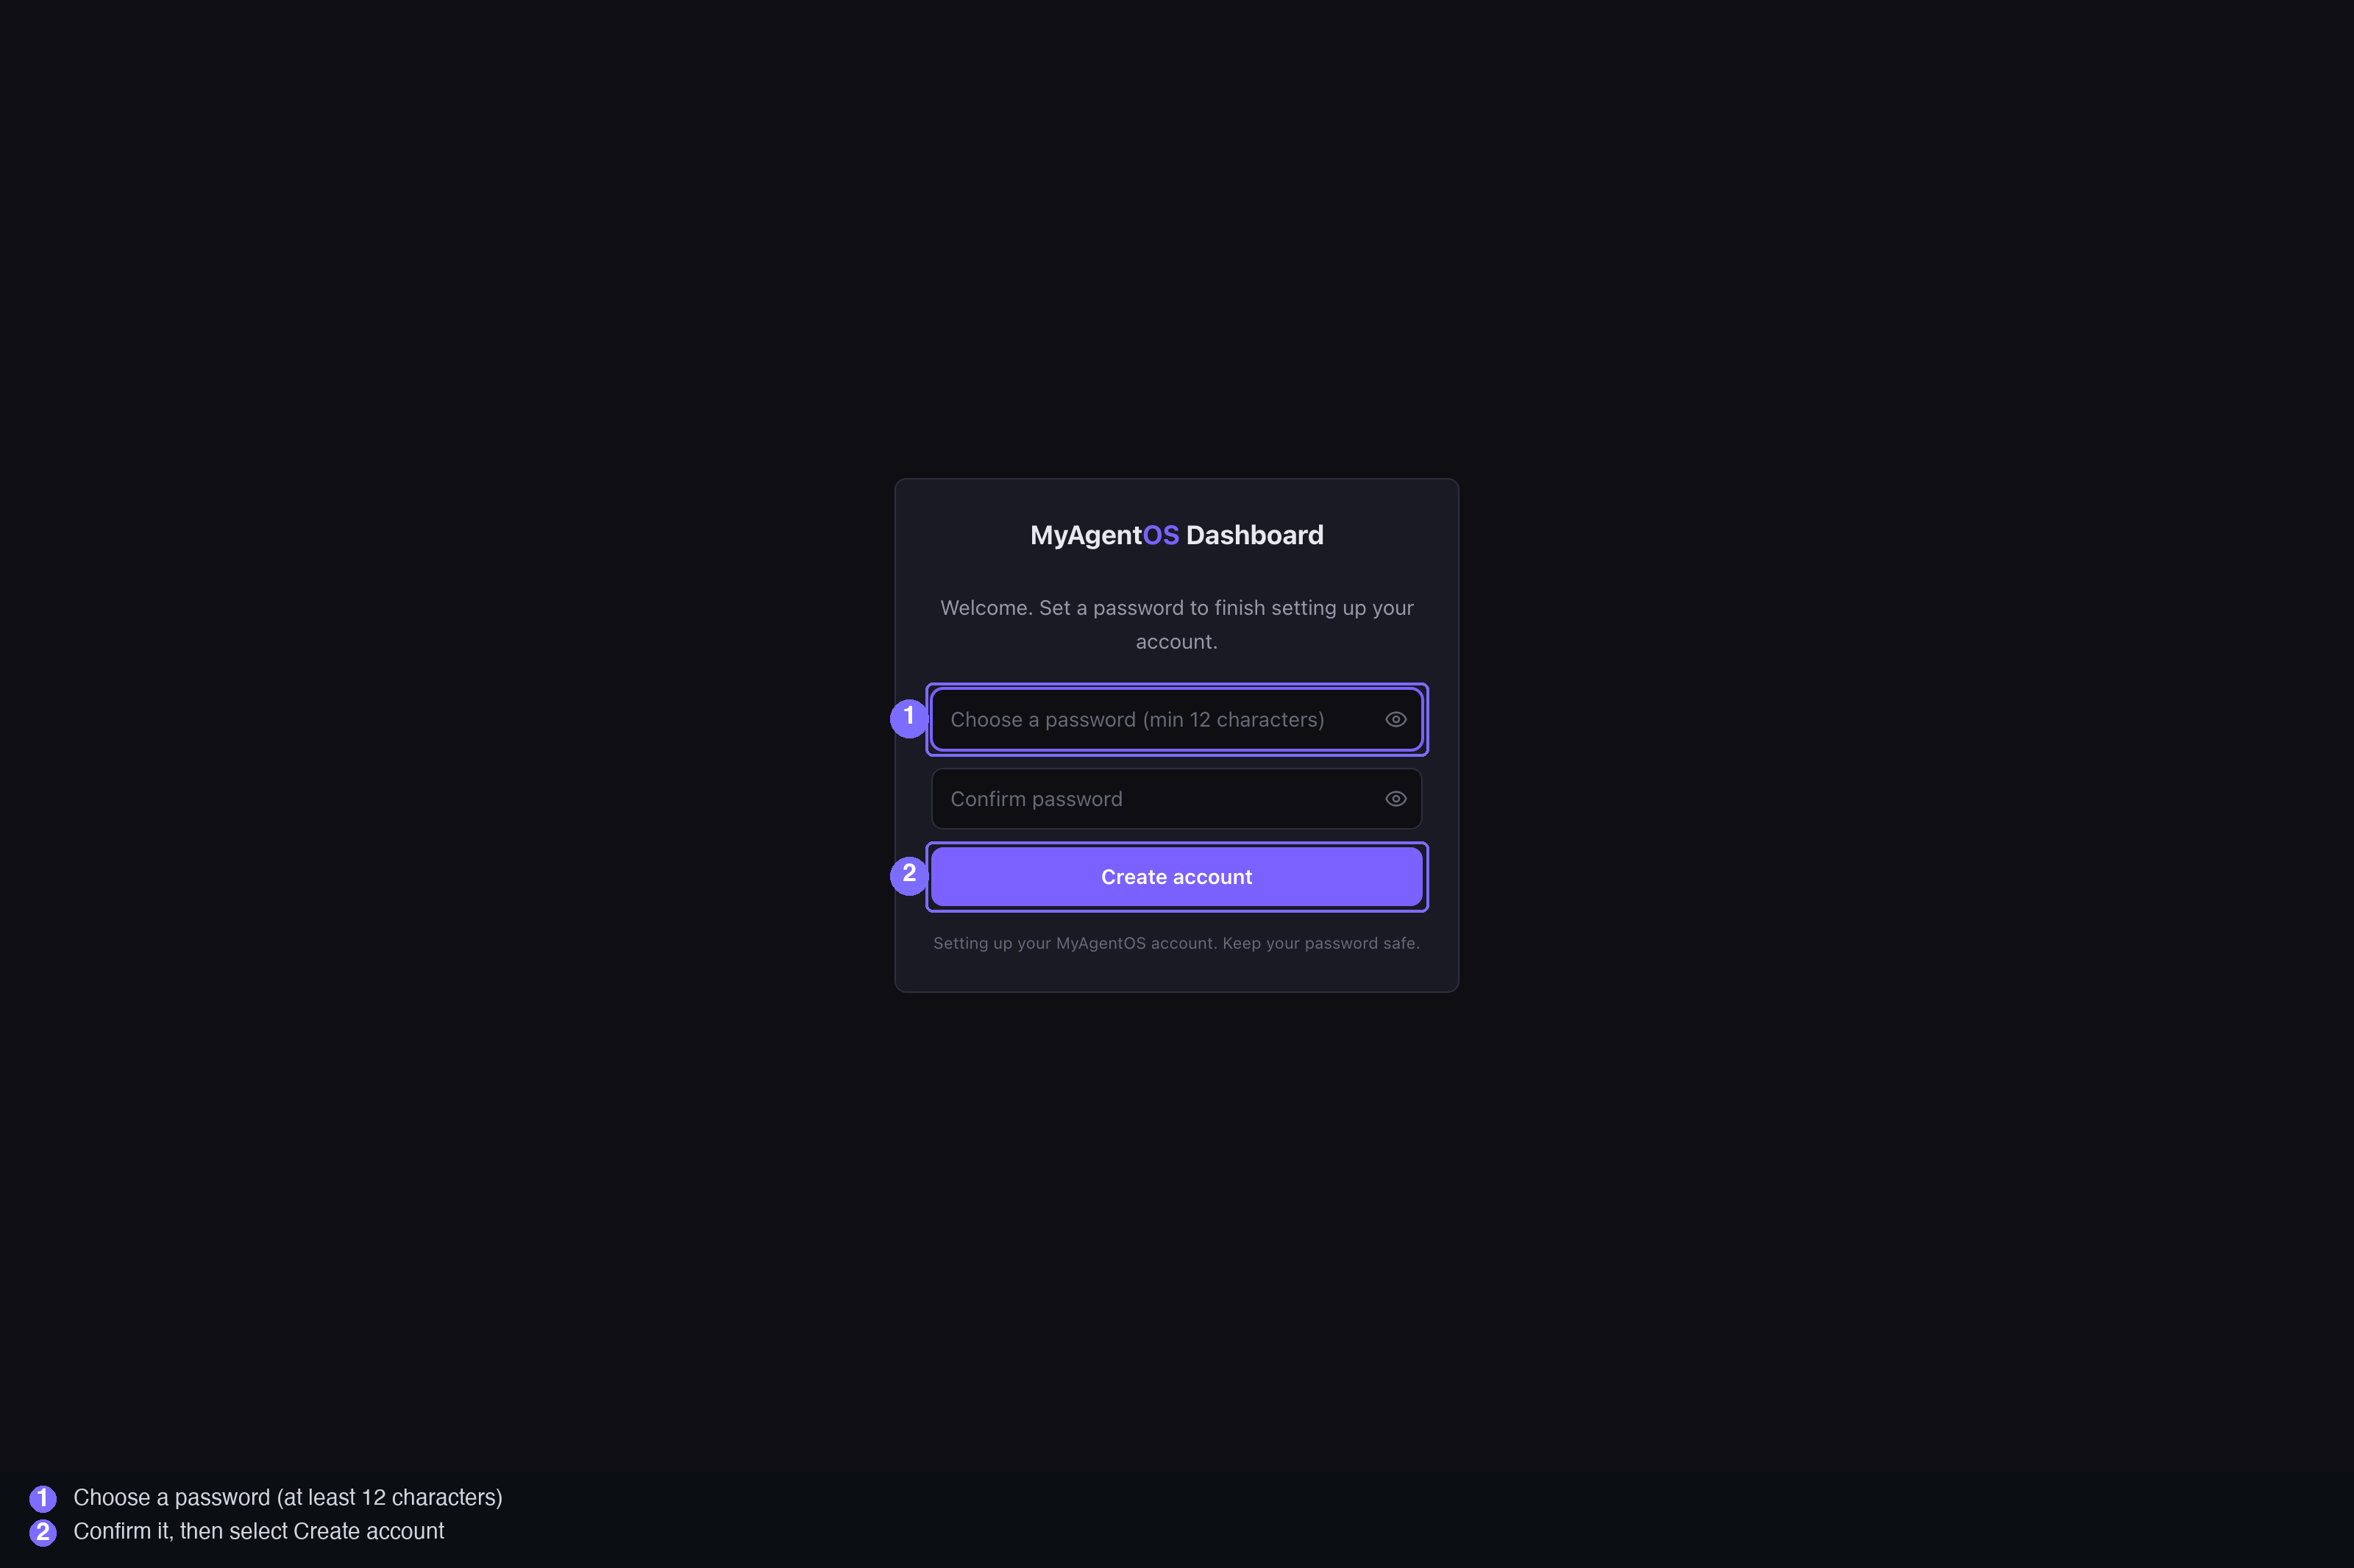
Two things happen automatically. The set-up code is stripped from the address bar the moment the page loads, so it never lingers in your history; and creating your account signs you straight in. The link is single-use by design: once your account exists, the claim page stops working, so a used or forwarded link cannot set up a second account.
4. Connect your AI
With your account created and no provider connected yet, the setup wizard opens: Welcome to MyAgentOS, with two cards.
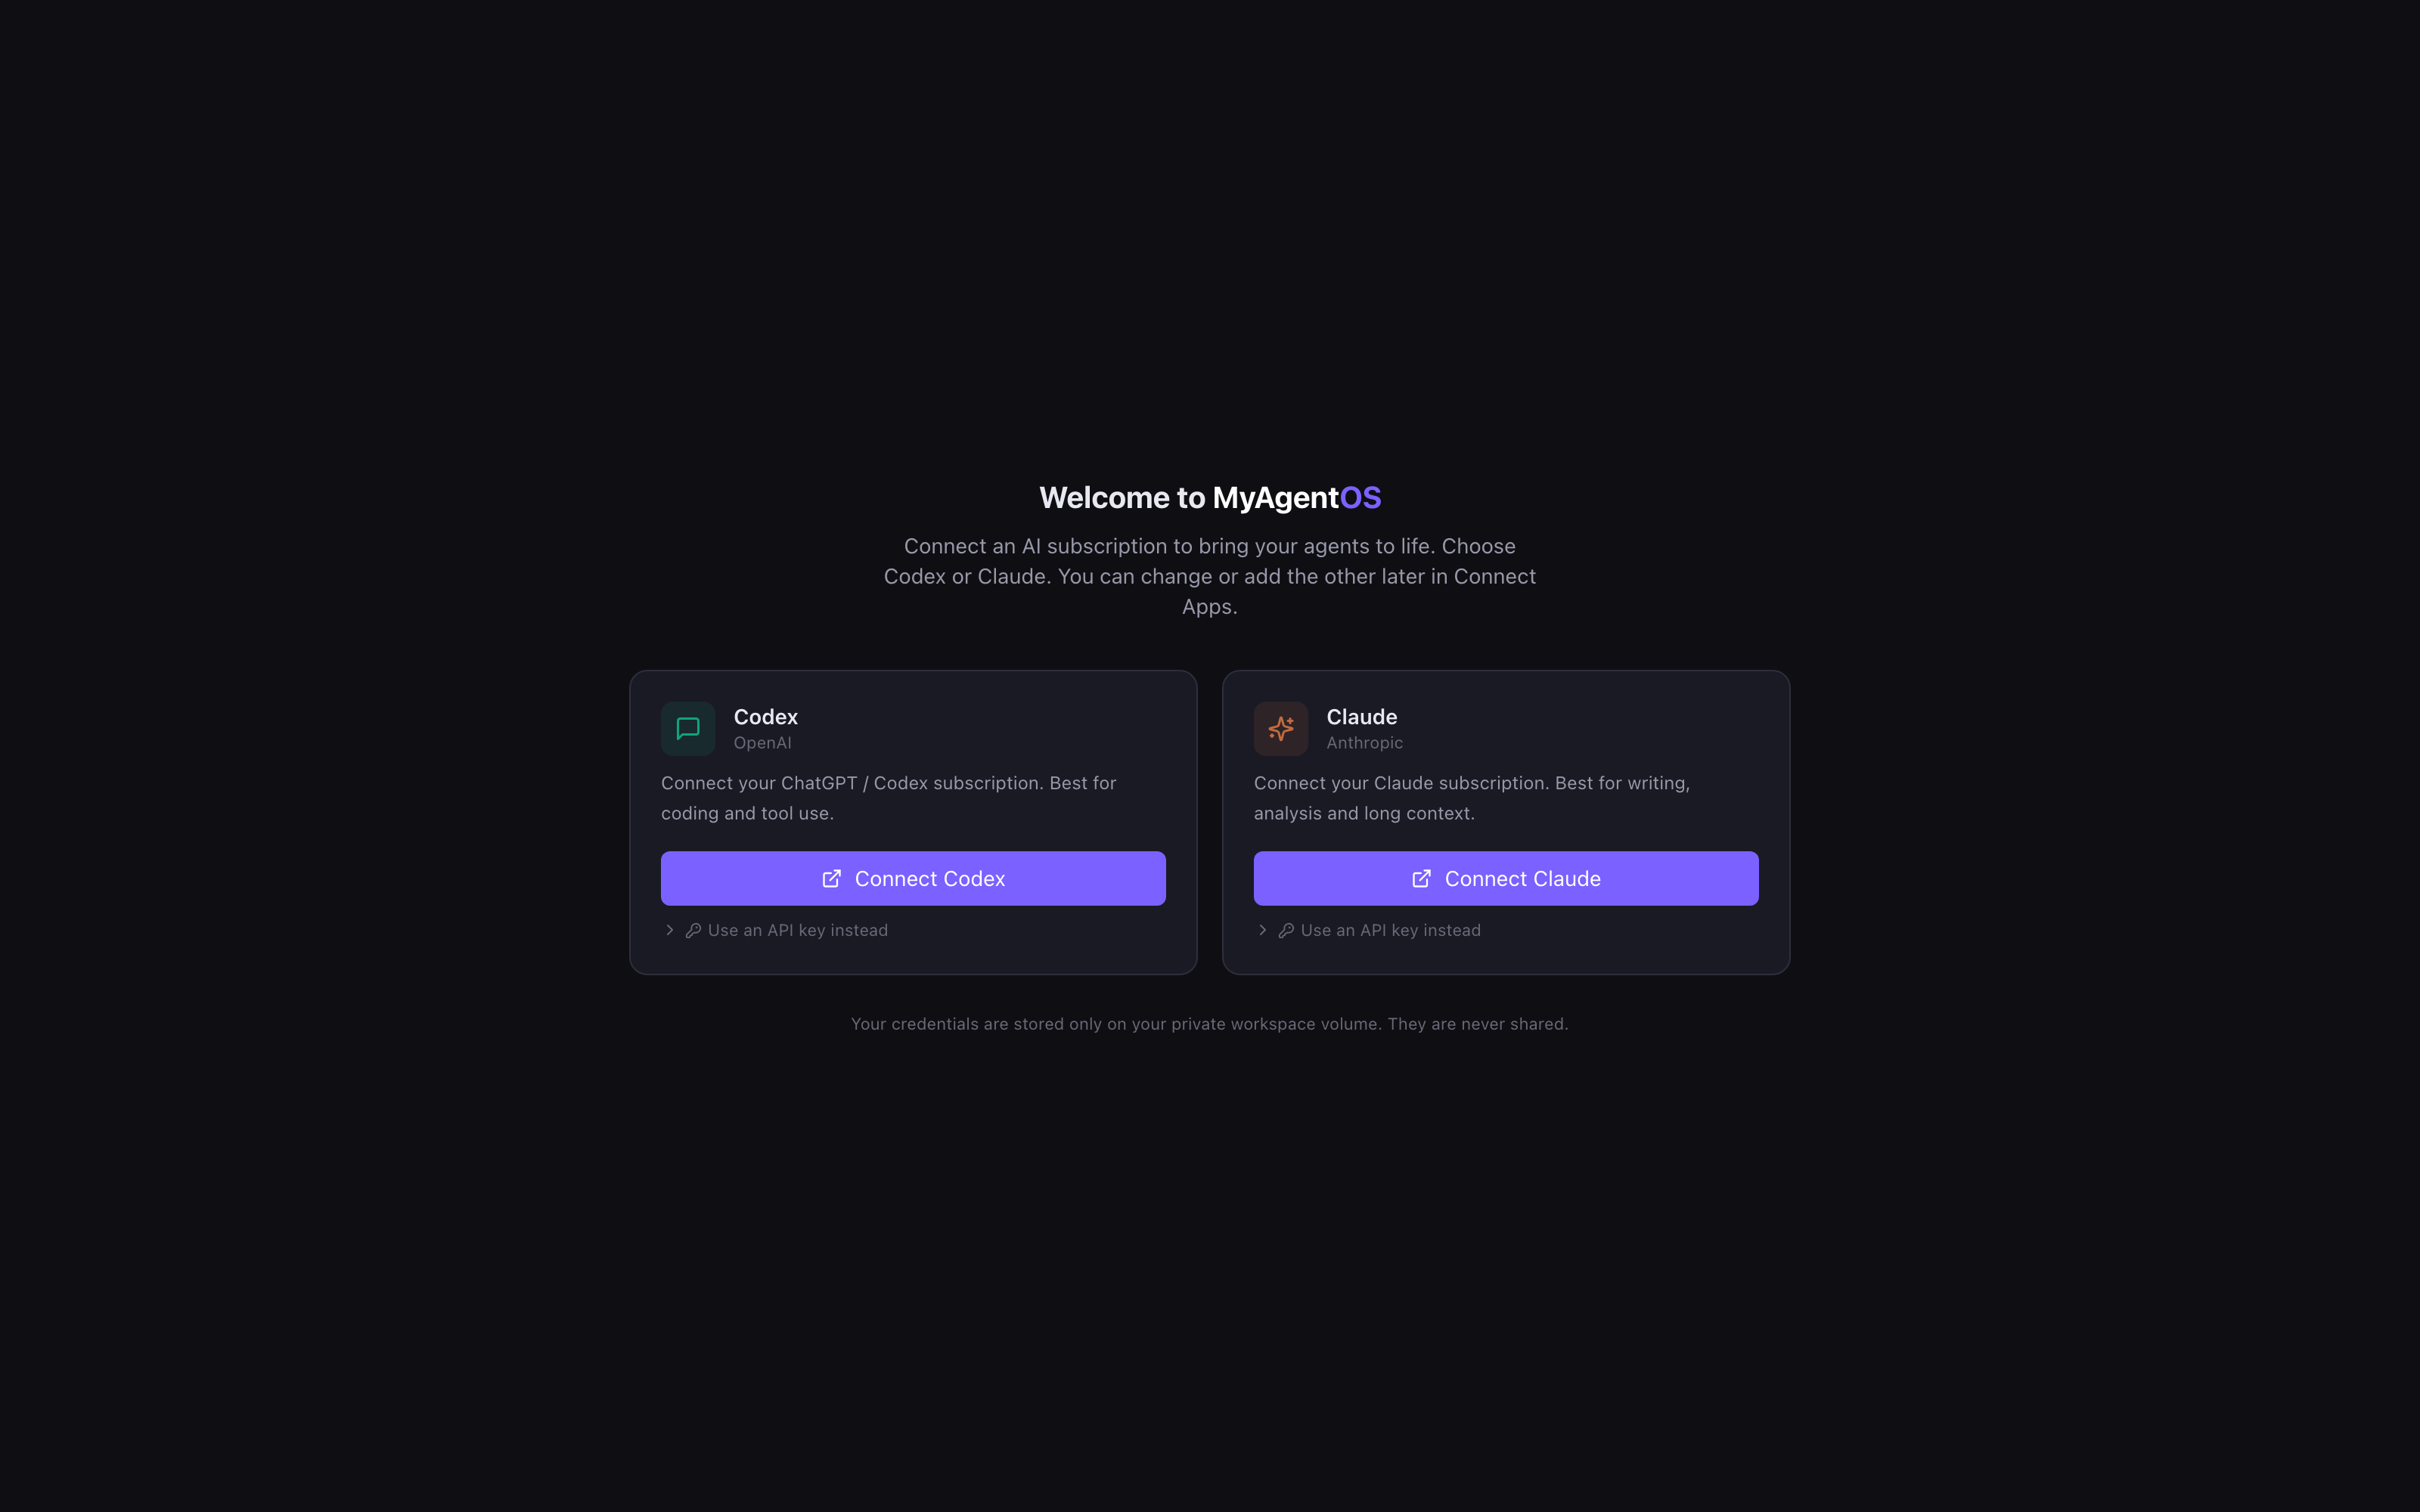
- Codex (OpenAI): "Connect your ChatGPT / Codex subscription. Best for coding and tool use." Select Connect Codex and a device-code sign-in opens in a new tab; the card shows Waiting for authorisation until you approve it, then finishes on its own. This is the recommended route: your agents run on the ChatGPT or Codex subscription you already pay for, with no metered API credit.
- Claude (Anthropic): "Connect your Claude subscription. Best for writing,
analysis and long context." Either connect the subscription, or select Use an
API key instead and paste an Anthropic key (
sk-ant-...).
Either card also offers Use an API key instead if you would rather paste a key than sign in. Your credentials are stored only on your private workspace volume; they are never shared. Connecting one provider is enough to bring the whole dashboard to life. For the full provider walkthrough, including OpenAI-by-key and the other providers, see Connecting your AI.
Good to know
Signing back in. After the first setup you sign in with your password. Your session lasts up to seven days of inactivity and is extended each time you use the dashboard, so day-to-day you rarely re-enter it.
Forgot your password? The sign-in screen has a Forgot your password? link. It emails a reset link to the address on file for your instance; the link is valid for 30 minutes.
Two-factor authentication. Optional, and off by default. In Settings, the security section reads "Two-factor authentication is off." with an Enable button: turn it on to add a one-time code from an authenticator app to your sign-in.
Where your keys live. On your own private instance, never shared. The dashboard shows only whether a provider is connected; it never displays the key back to you, and key fields are masked as you type.