Install MyAgentOS on Mac (beta)
Download the signed installer, run it, and the dashboard opens at
localhost:3002. No Terminal, no account, no password to invent.
MyAgentOS installs natively on the Mac from an installer that is signed and
notarised by Apple. Everything it creates lives in one folder,
~/Documents/MyAgentOS, and the dashboard runs at
http://localhost:3002 on your own machine. It runs on
your hardware with your own provider keys: there is no account to create, and
localhost answers only to your Mac.
Who it is for: anyone on the beta programme with a Mac. The installer route below needs no Terminal at all. If you would rather we ran it for you, see Getting started: Hosted; if you are on Windows, see Install on Windows.
Prefer to watch? Getting started: Mac app walks the same flow as a narrated video; the narration is an AI-generated voice.
About the version numbers below: the installer names the build current at the time of writing. The early-access page always carries the current download, so take the file from there rather than from an old link.
Before you start
Three things, and only one of them is a download.
1. A Mac. Any Intel or Apple Silicon Mac running macOS 13 or later.
2. Node.js 22 or later. Free, and the one prerequisite the installer cannot set up for you. Download the macOS installer from nodejs.org/en/download and run it like any other app.
3. An AI provider account. A ChatGPT subscription, an OpenAI API key or an Anthropic API key. One is enough to start; you can add others later.
1. Unlock the early-access page
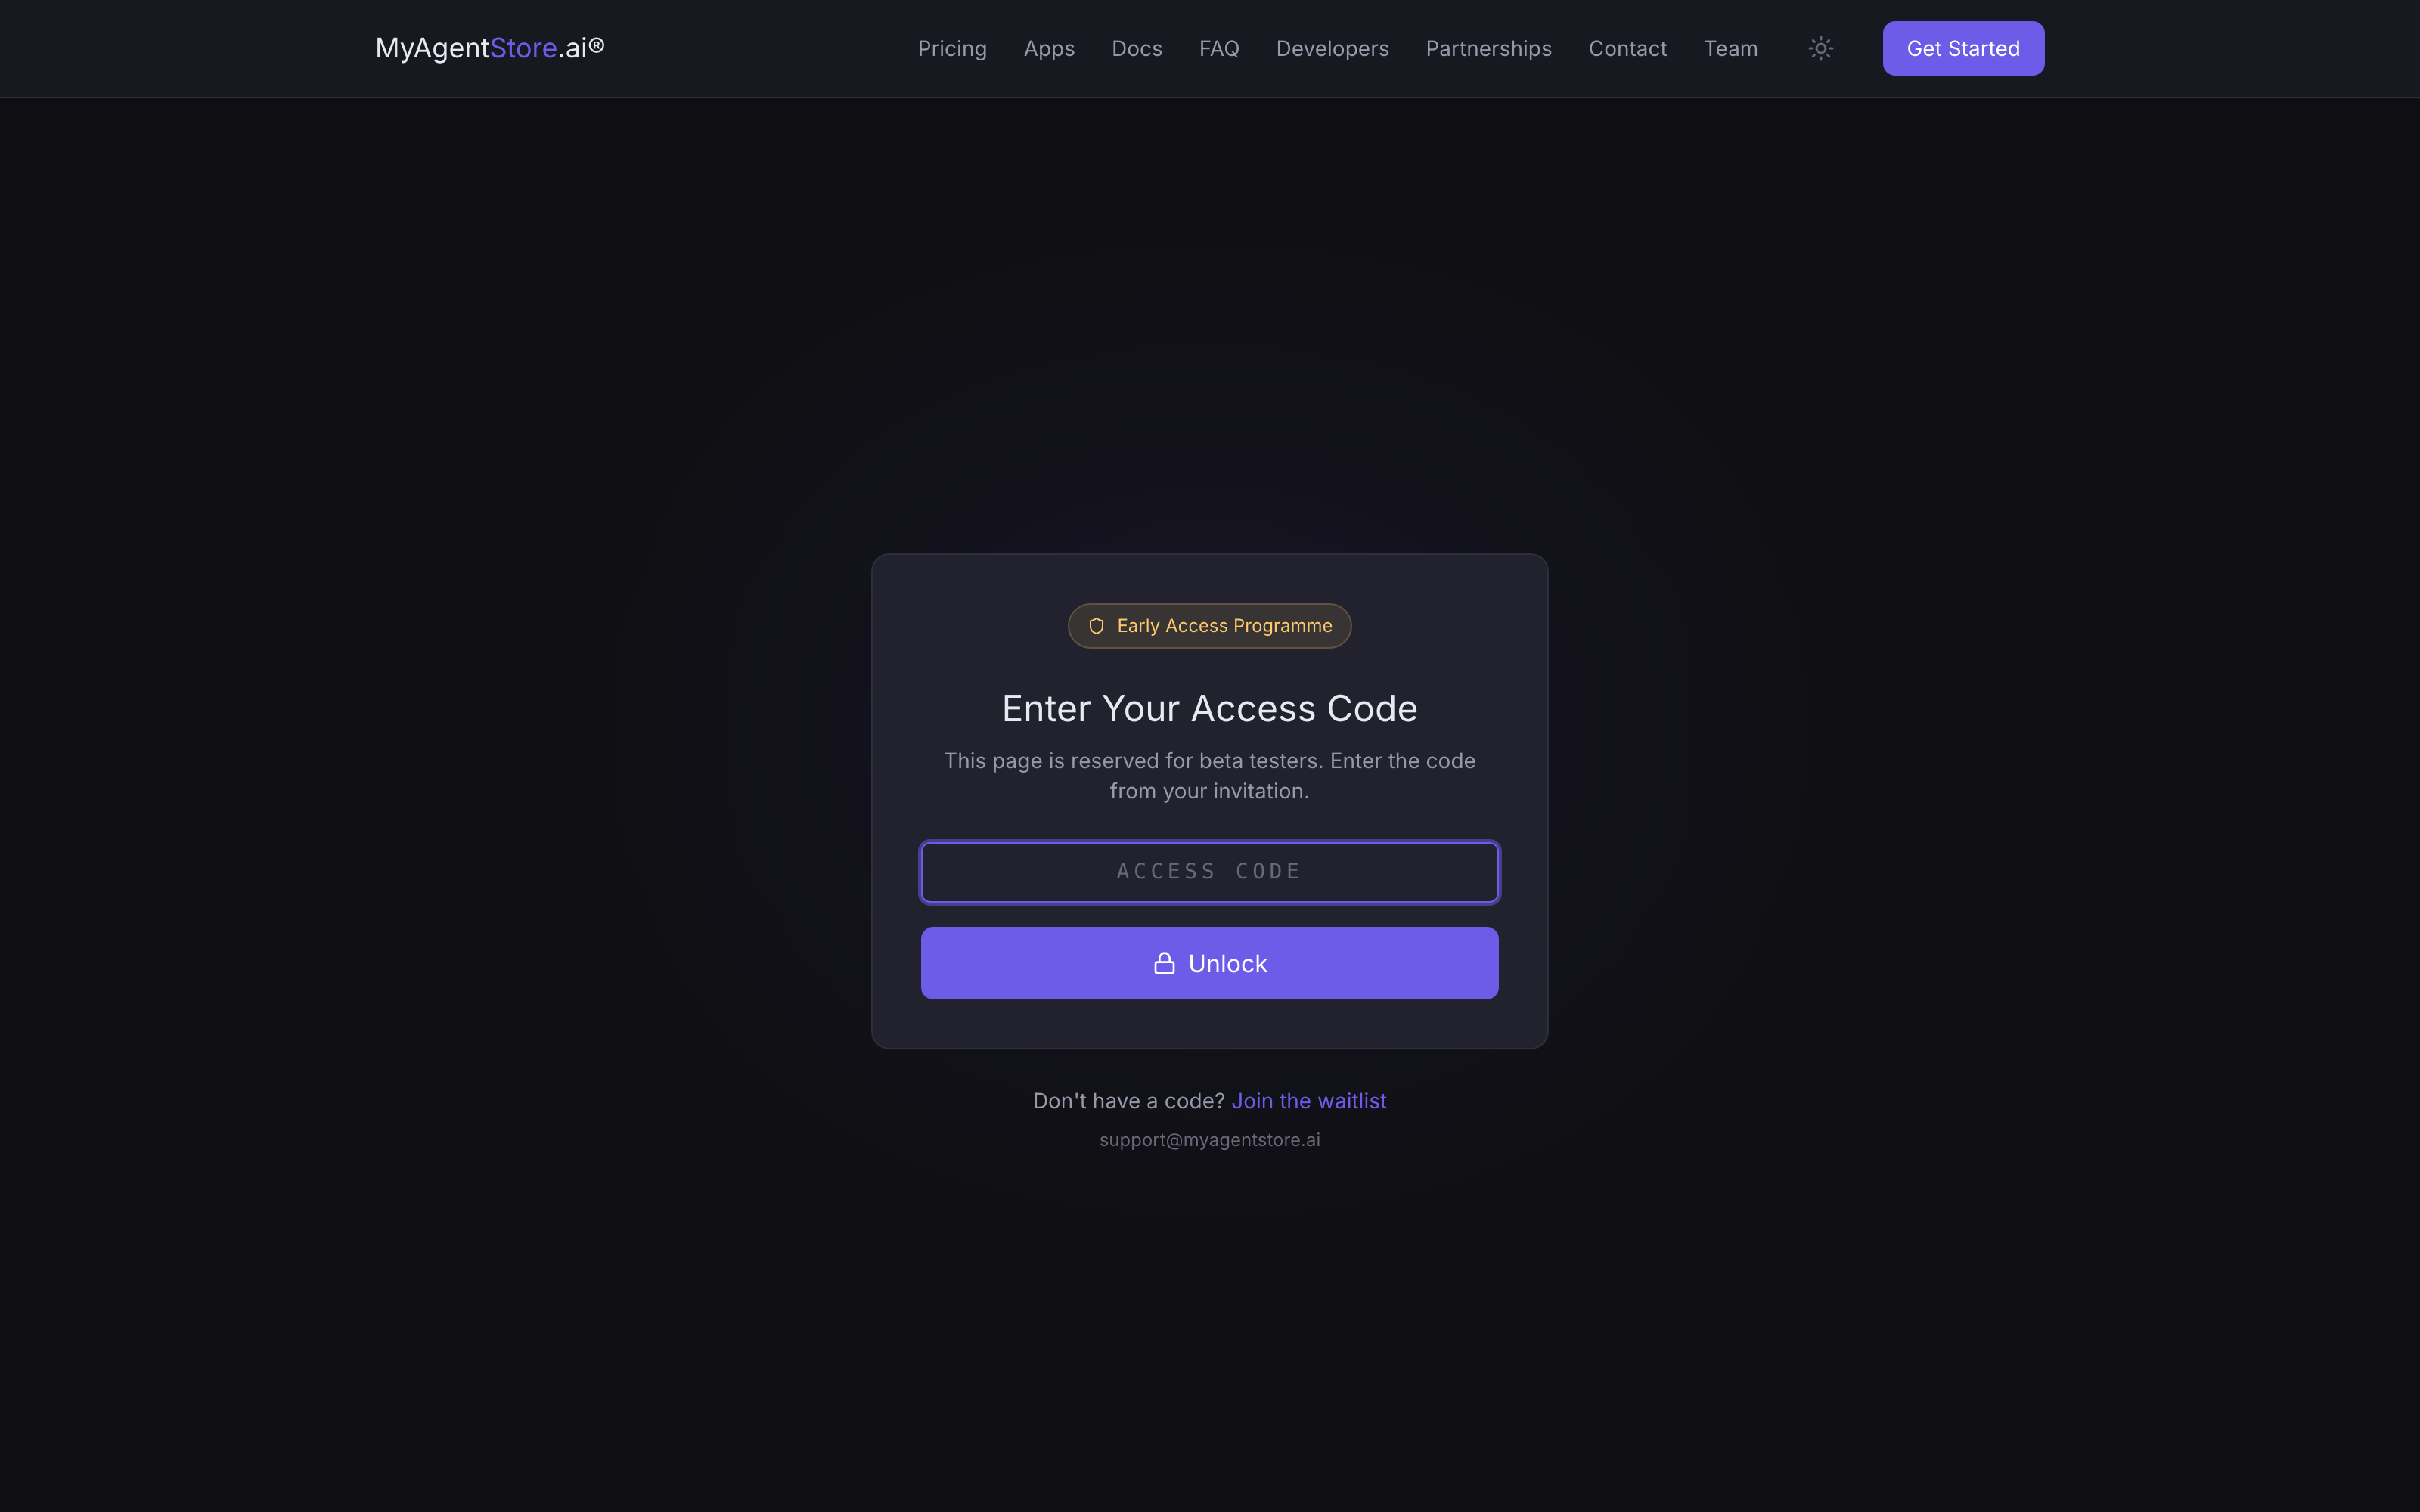
The Mac app is in closed beta, so the download sits behind an access gate. Take the code from your invitation email, open the early-access page, enter the code and select Unlock. Keep the code to yourself: it is not something to paste into a forum, a screenshot or a support ticket.
Once unlocked, choose Mac in the platform chooser at the top, or scroll to the Mac steps.
2. Download the installer
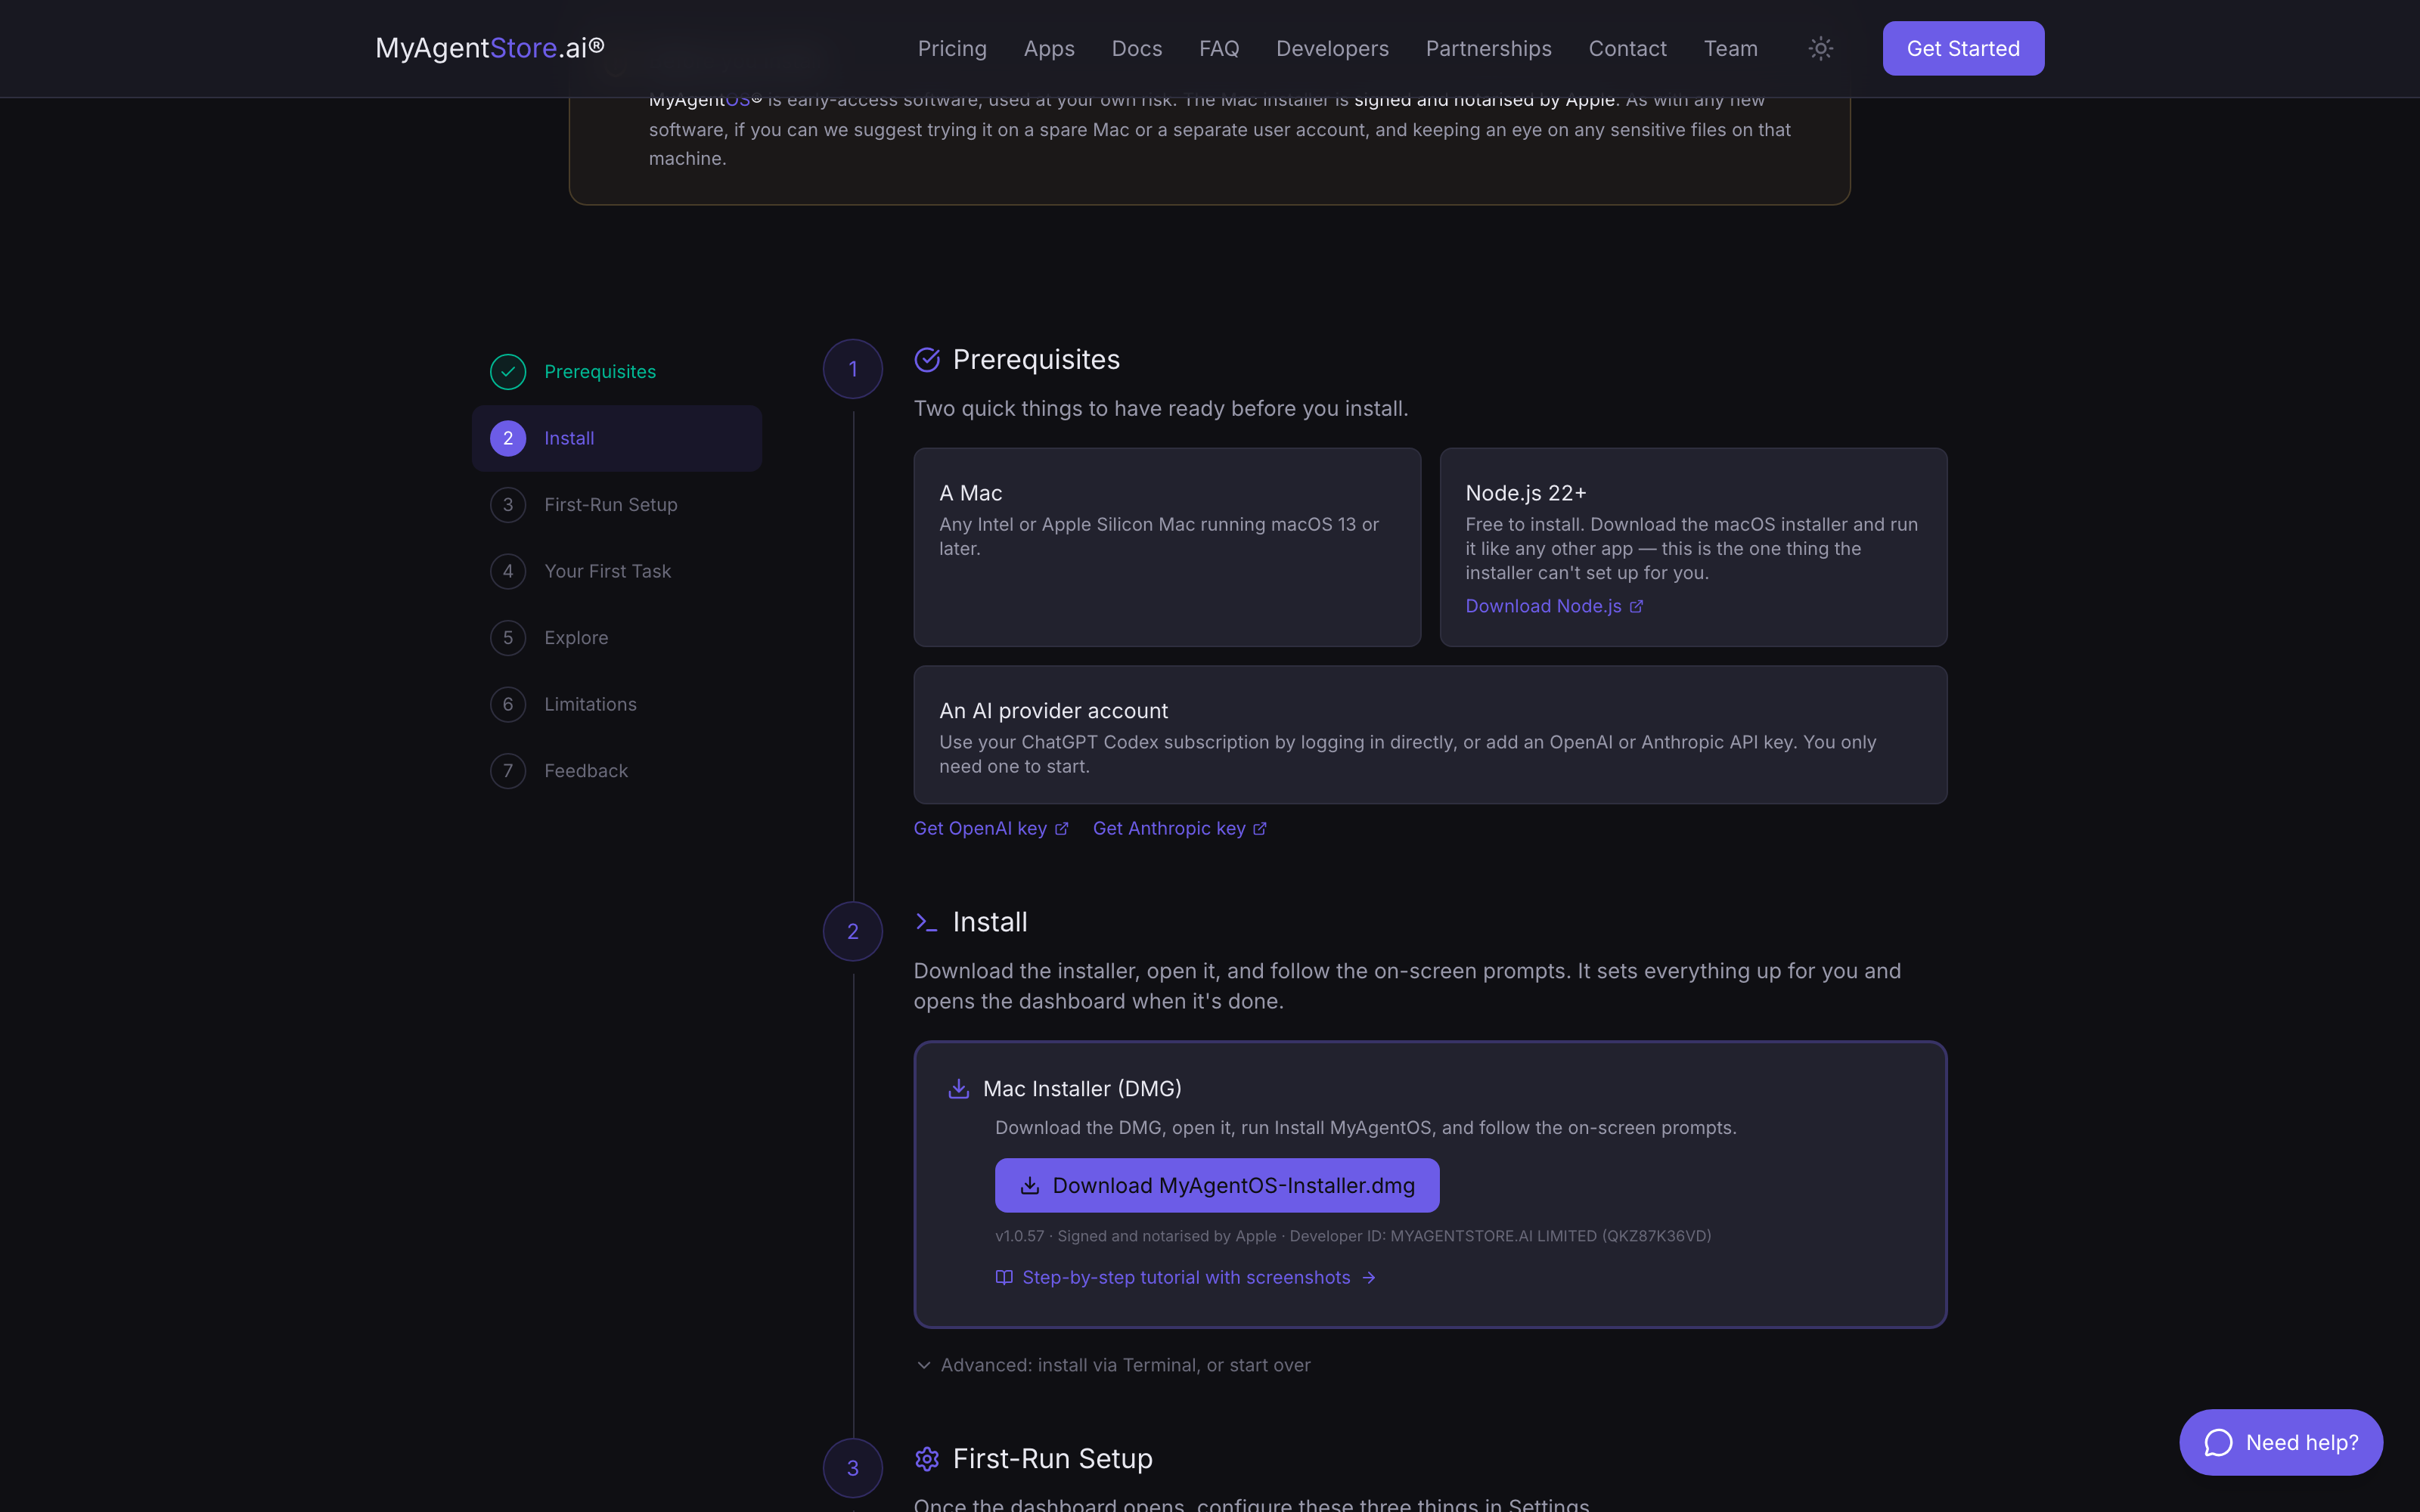
In Step 2: Install, the Mac Installer (DMG) card gives you the download. Select Download MyAgentOS-Installer.dmg.
The installer is signed and notarised by Apple under Developer ID MYAGENTSTORE.AI LIMITED (QKZ87K36VD), so macOS opens it without a Gatekeeper warning.
Success looks like: MyAgentOS-Installer.dmg in your Downloads folder.
3. Run the installer
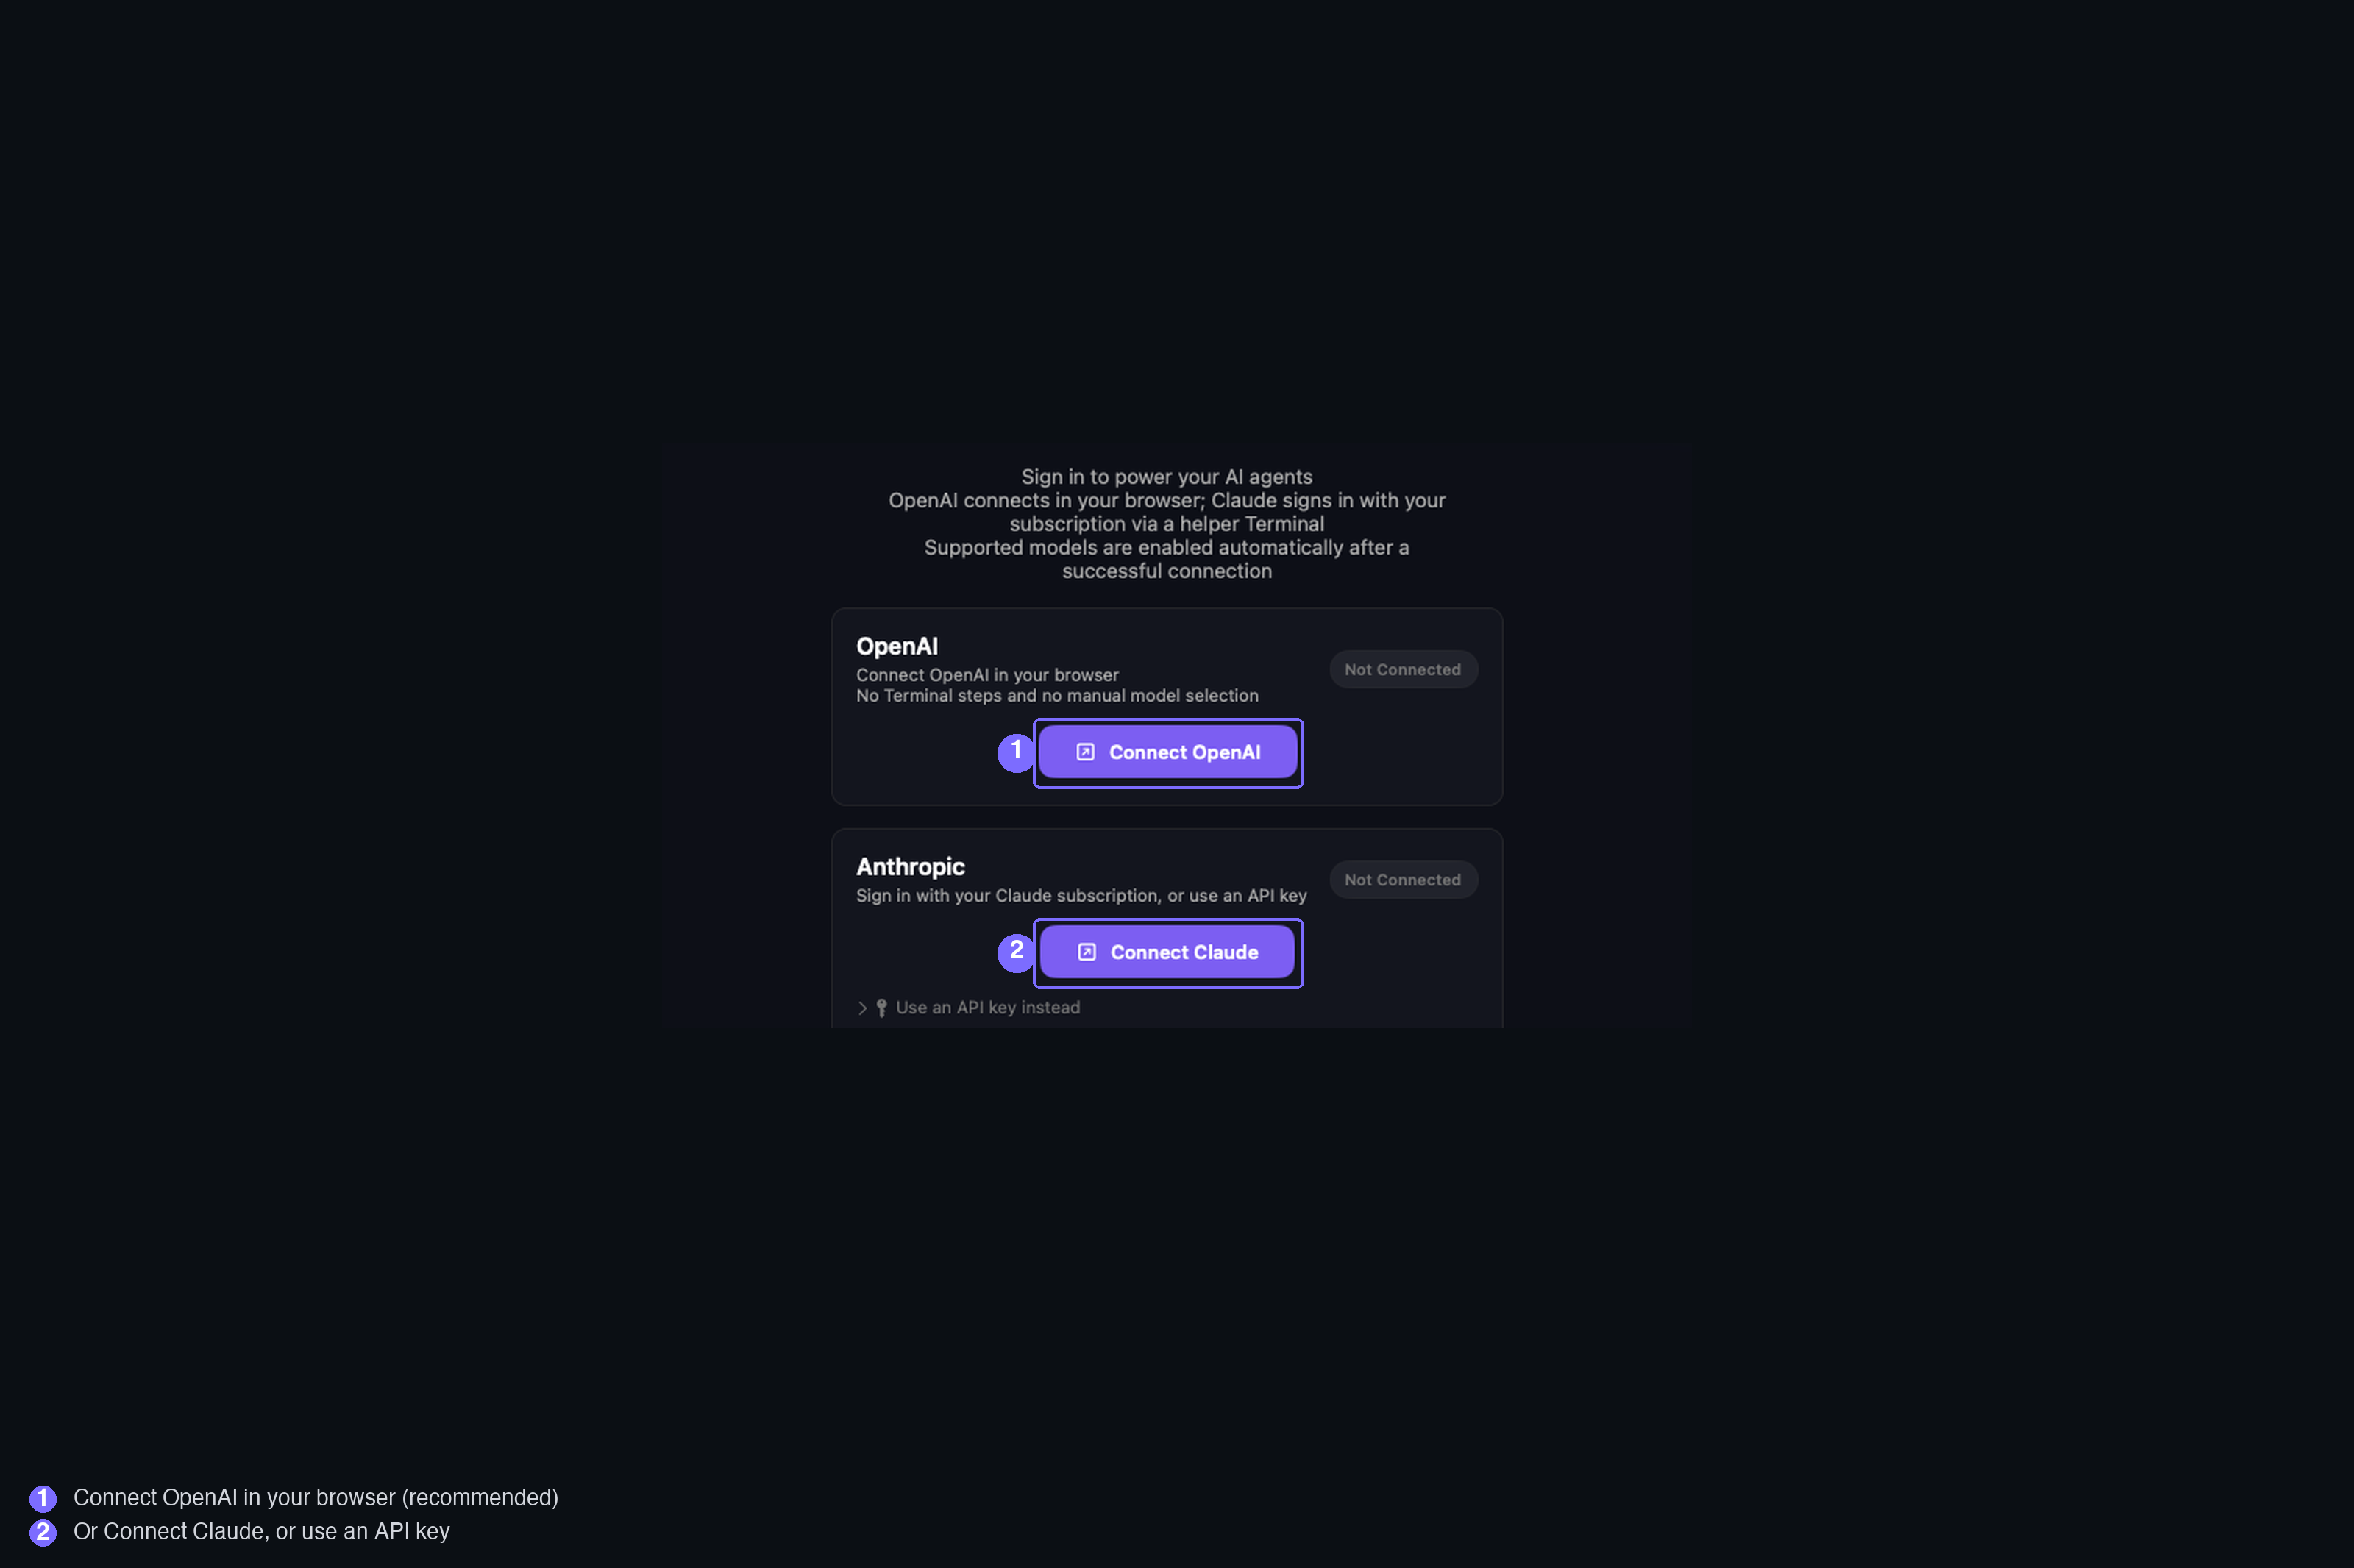
Open the downloaded disk image and run Install MyAgentOS, then follow the on-screen prompts. It walks through four screens:
- Welcome. A short introduction noting that the dashboard opens at
localhost:3002. Select Install to begin. - Installing. It verifies the signed payload, then installs MyAgentOS into
~/Documents/MyAgentOS. - Provider. Connect an API Provider: connect OpenAI in your browser, connect Claude, or paste an API key. Skip for now is perfectly fine; you can do this in the dashboard afterwards, and step 6 below covers it.
- Complete. "Installation Complete", with your dashboard token if one was created. Save that token somewhere safe. Select Open Dashboard.
Somewhere in the middle the Mac may ask for your password. That is macOS asking for permission to install, not us asking for anything: nothing you type there reaches MyAgentOS or leaves your machine.
Success looks like: the installer reaches "Installation Complete" and opens
localhost:3002 in your browser.
4. First run
On your own Mac, opening localhost:3002 usually takes you straight in: the
dashboard trusts a request from the machine it is running on, so there is nothing
to sign in with.
From a second browser, or from another device on your network, it asks once for the dashboard token the installer showed you. Paste it and select Sign in. The screen tells you where to find it if you did not save it, and Connecting your AI has the full walkthrough.
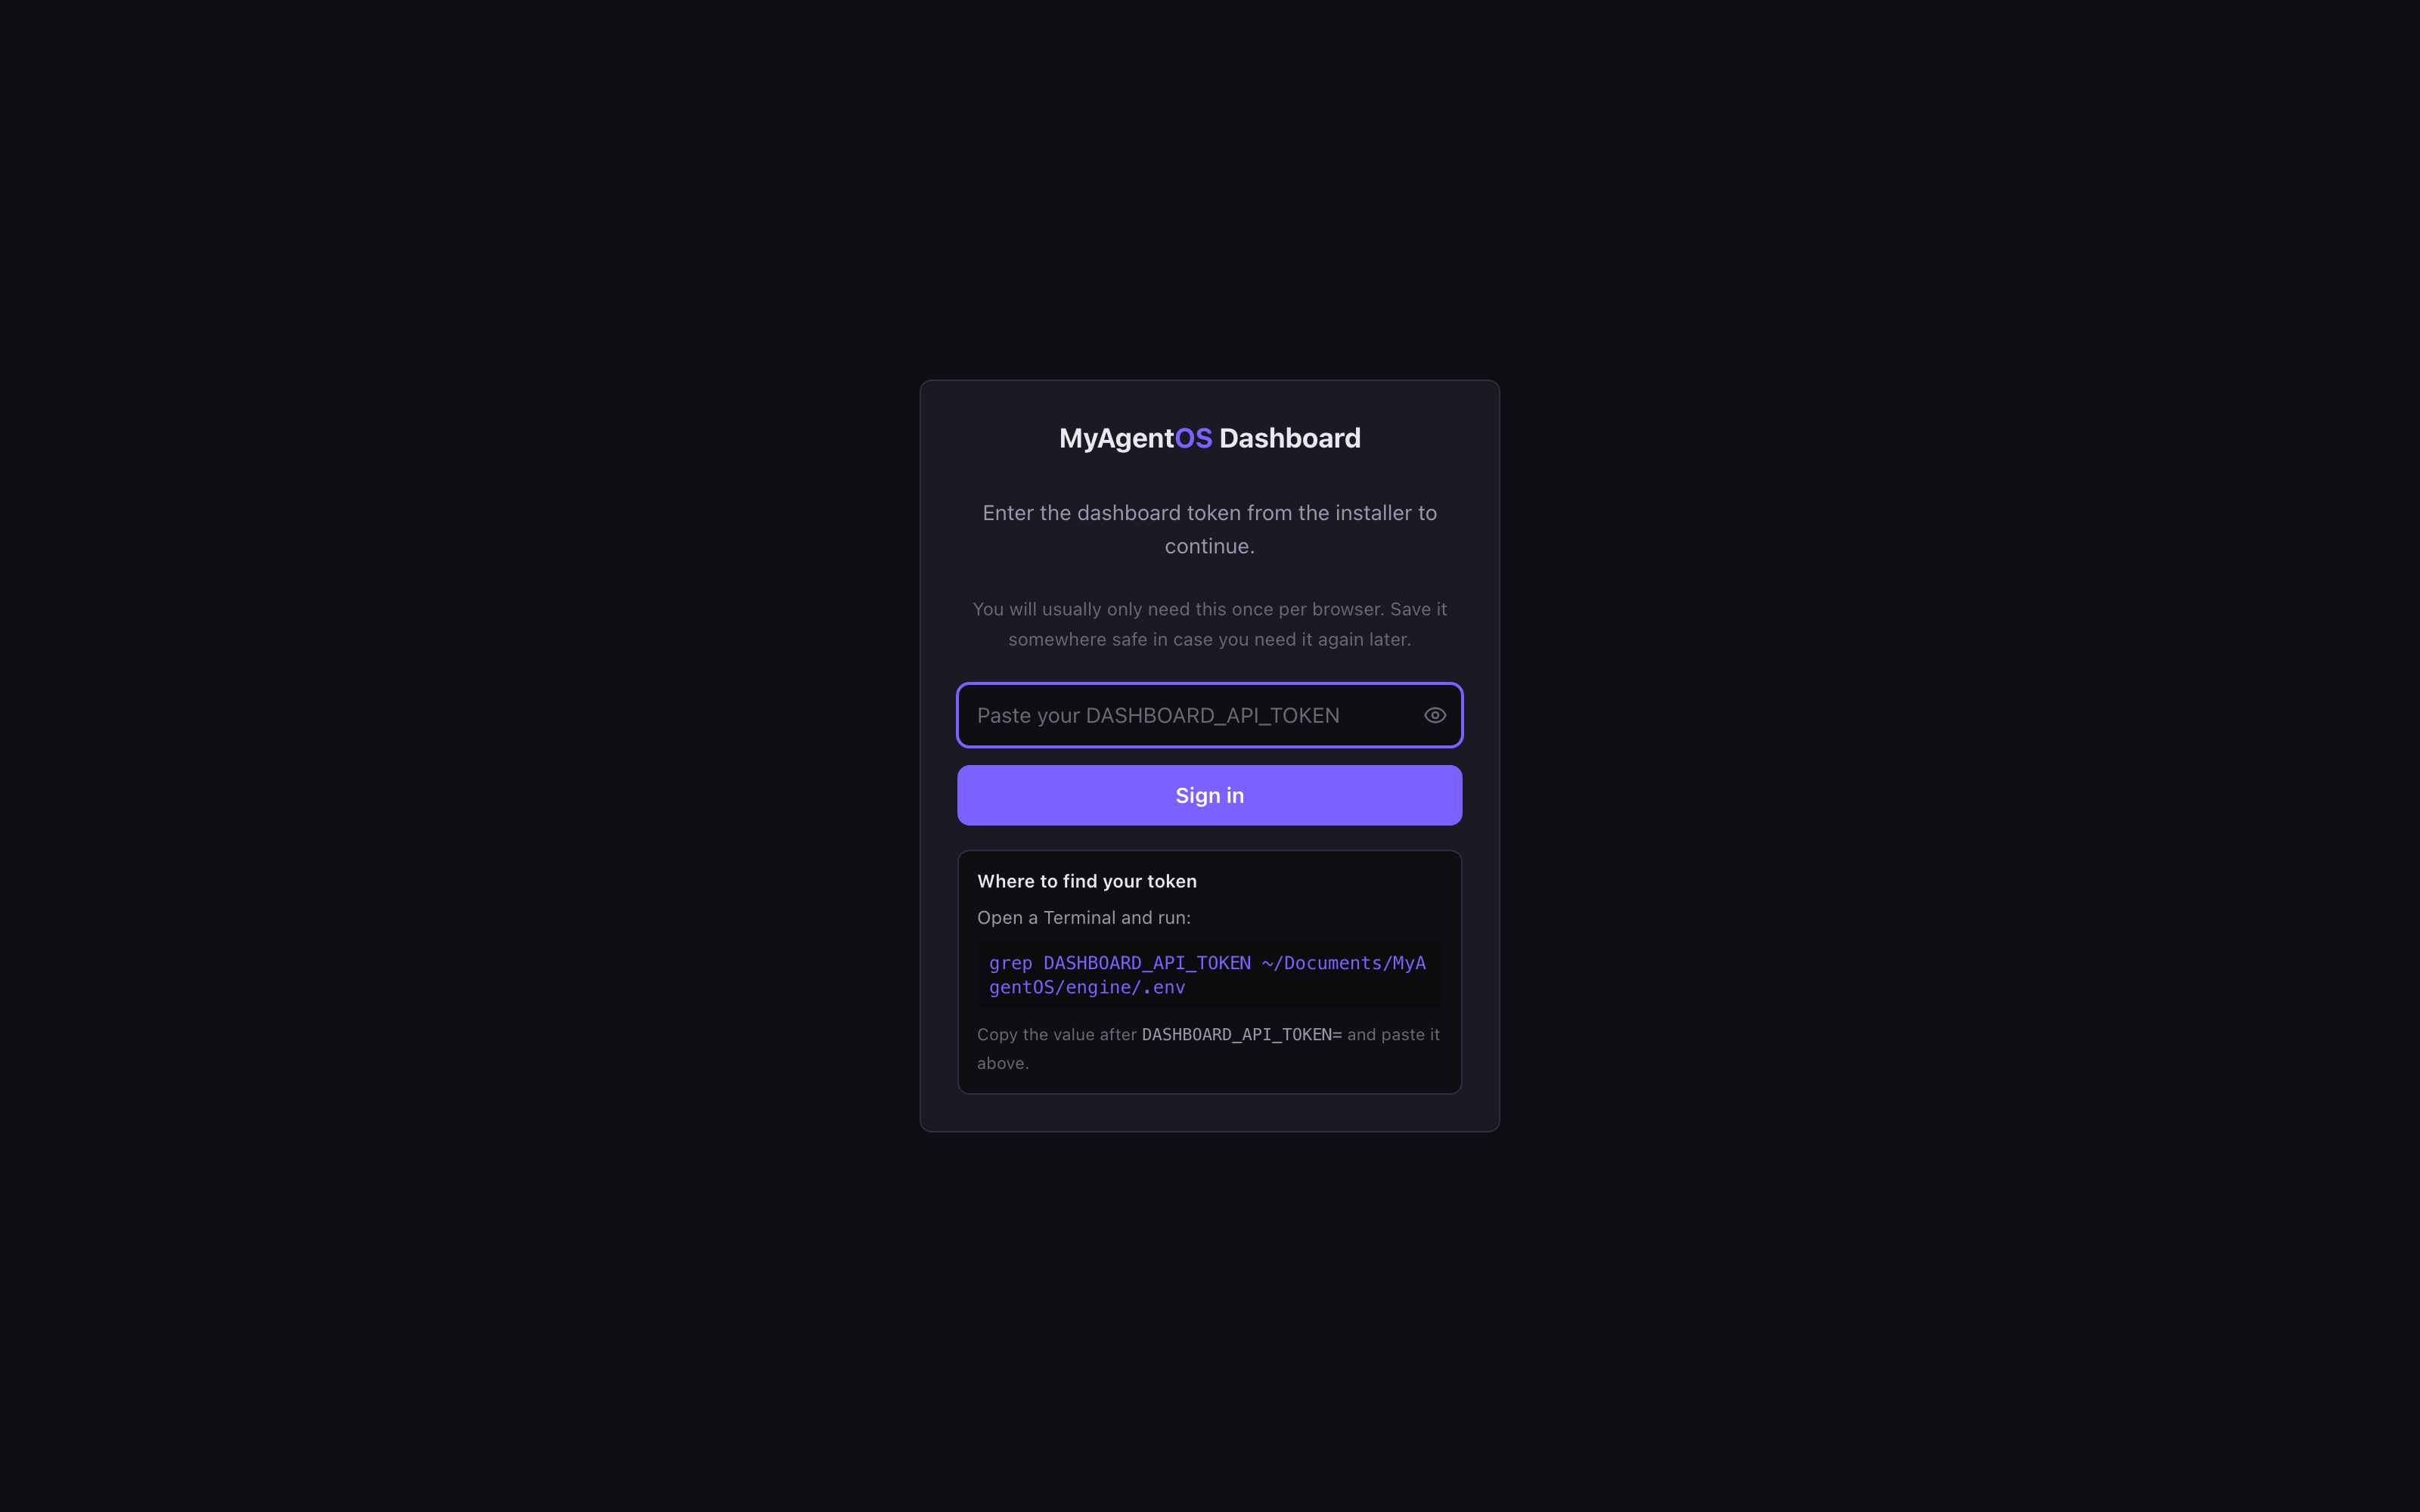
Either way you land on the dashboard, with No provider connected in the top bar until you connect an AI.
5. First-run setup
Open Settings from the sidebar and set three things.
Choose your model. Under General Chat Model, pick the model your agents will use. Claude Sonnet is a good default for the balance of speed and quality.
Name your workspace. Under Naming & Identity, give your organisation a name. It appears throughout the dashboard and in what your agents write.
Connect Trello (optional). In Connect Apps, add your Trello API key and token if you want two-way kanban sync between the dashboard and Trello. Skip it if you do not use Trello; nothing else depends on it.
6. Connect a provider
Open Connect Apps from the sidebar and expand AI Providers. Two routes, and you only need one.
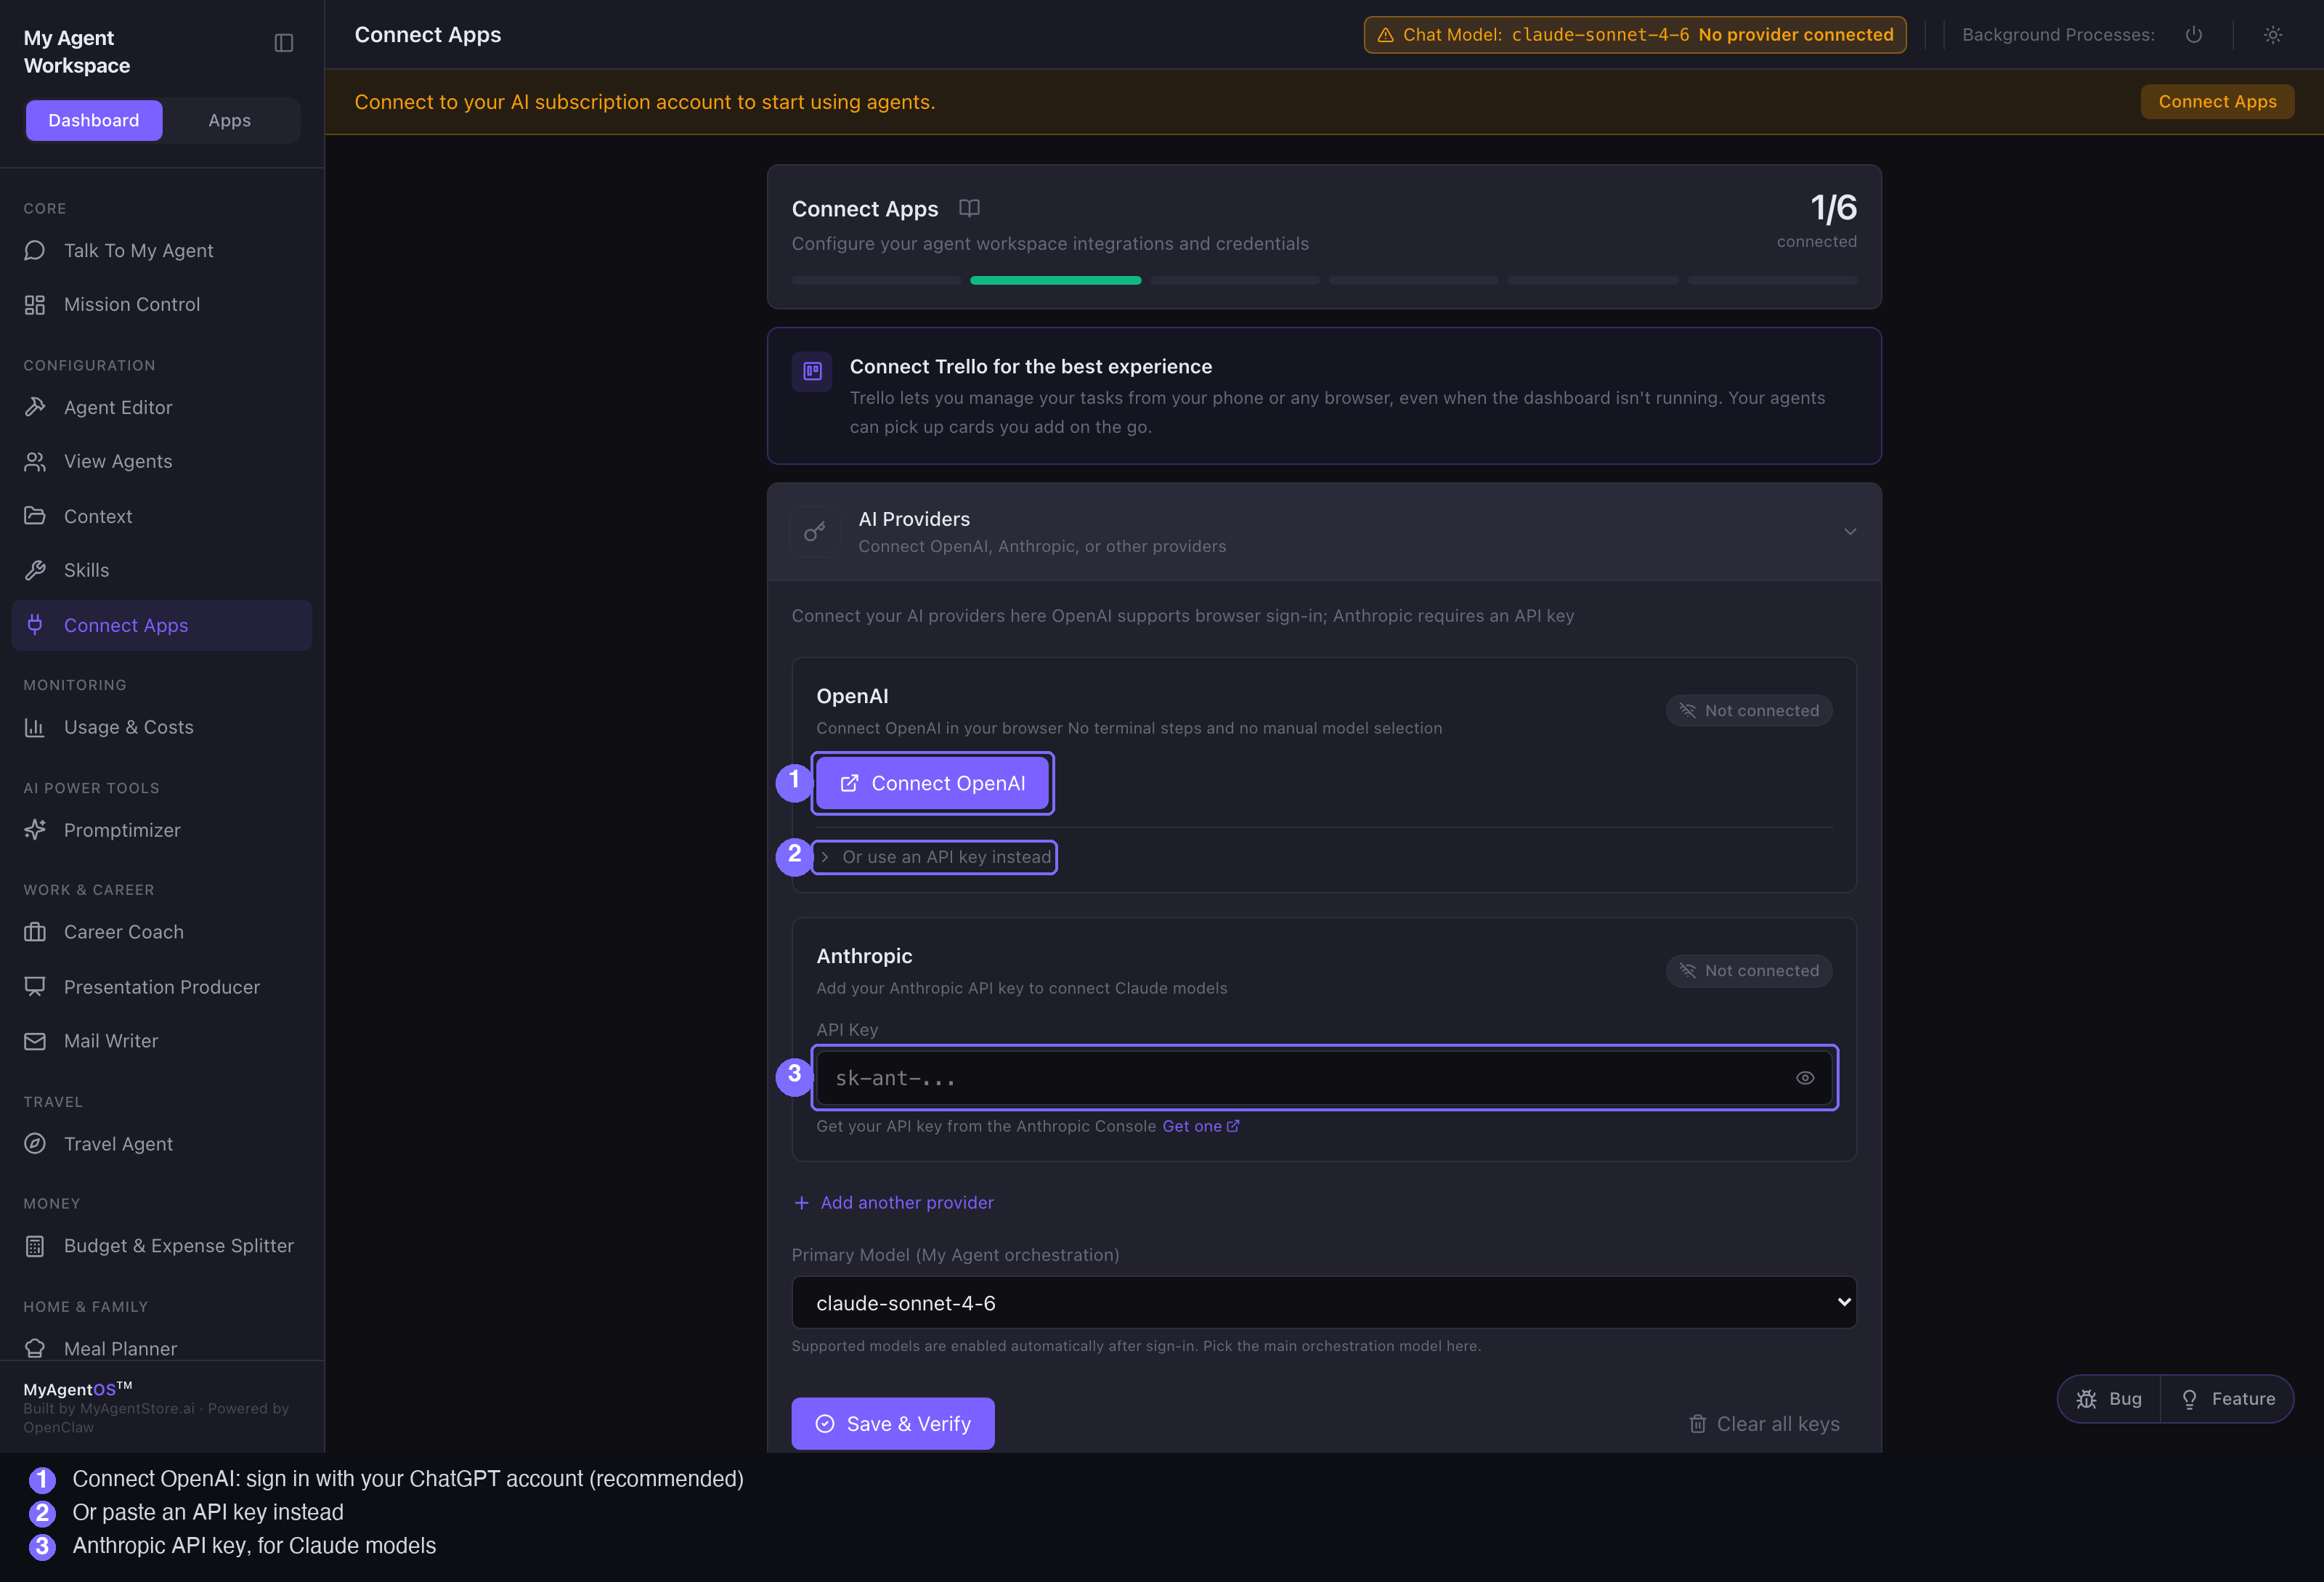
With your ChatGPT subscription (recommended). Select Connect OpenAI, authorise in the browser window that opens, and the connection completes on its own. Your agents then run on the subscription you already pay for rather than on metered API credit.
With an API key. Paste a key instead: Anthropic for Claude models, OpenAI, or one of the other providers under Add another provider. Select Save & Verify. Keys are billed per token by the provider, not by us.
The full walkthrough, including every provider and how to switch later, is on Connecting your AI.
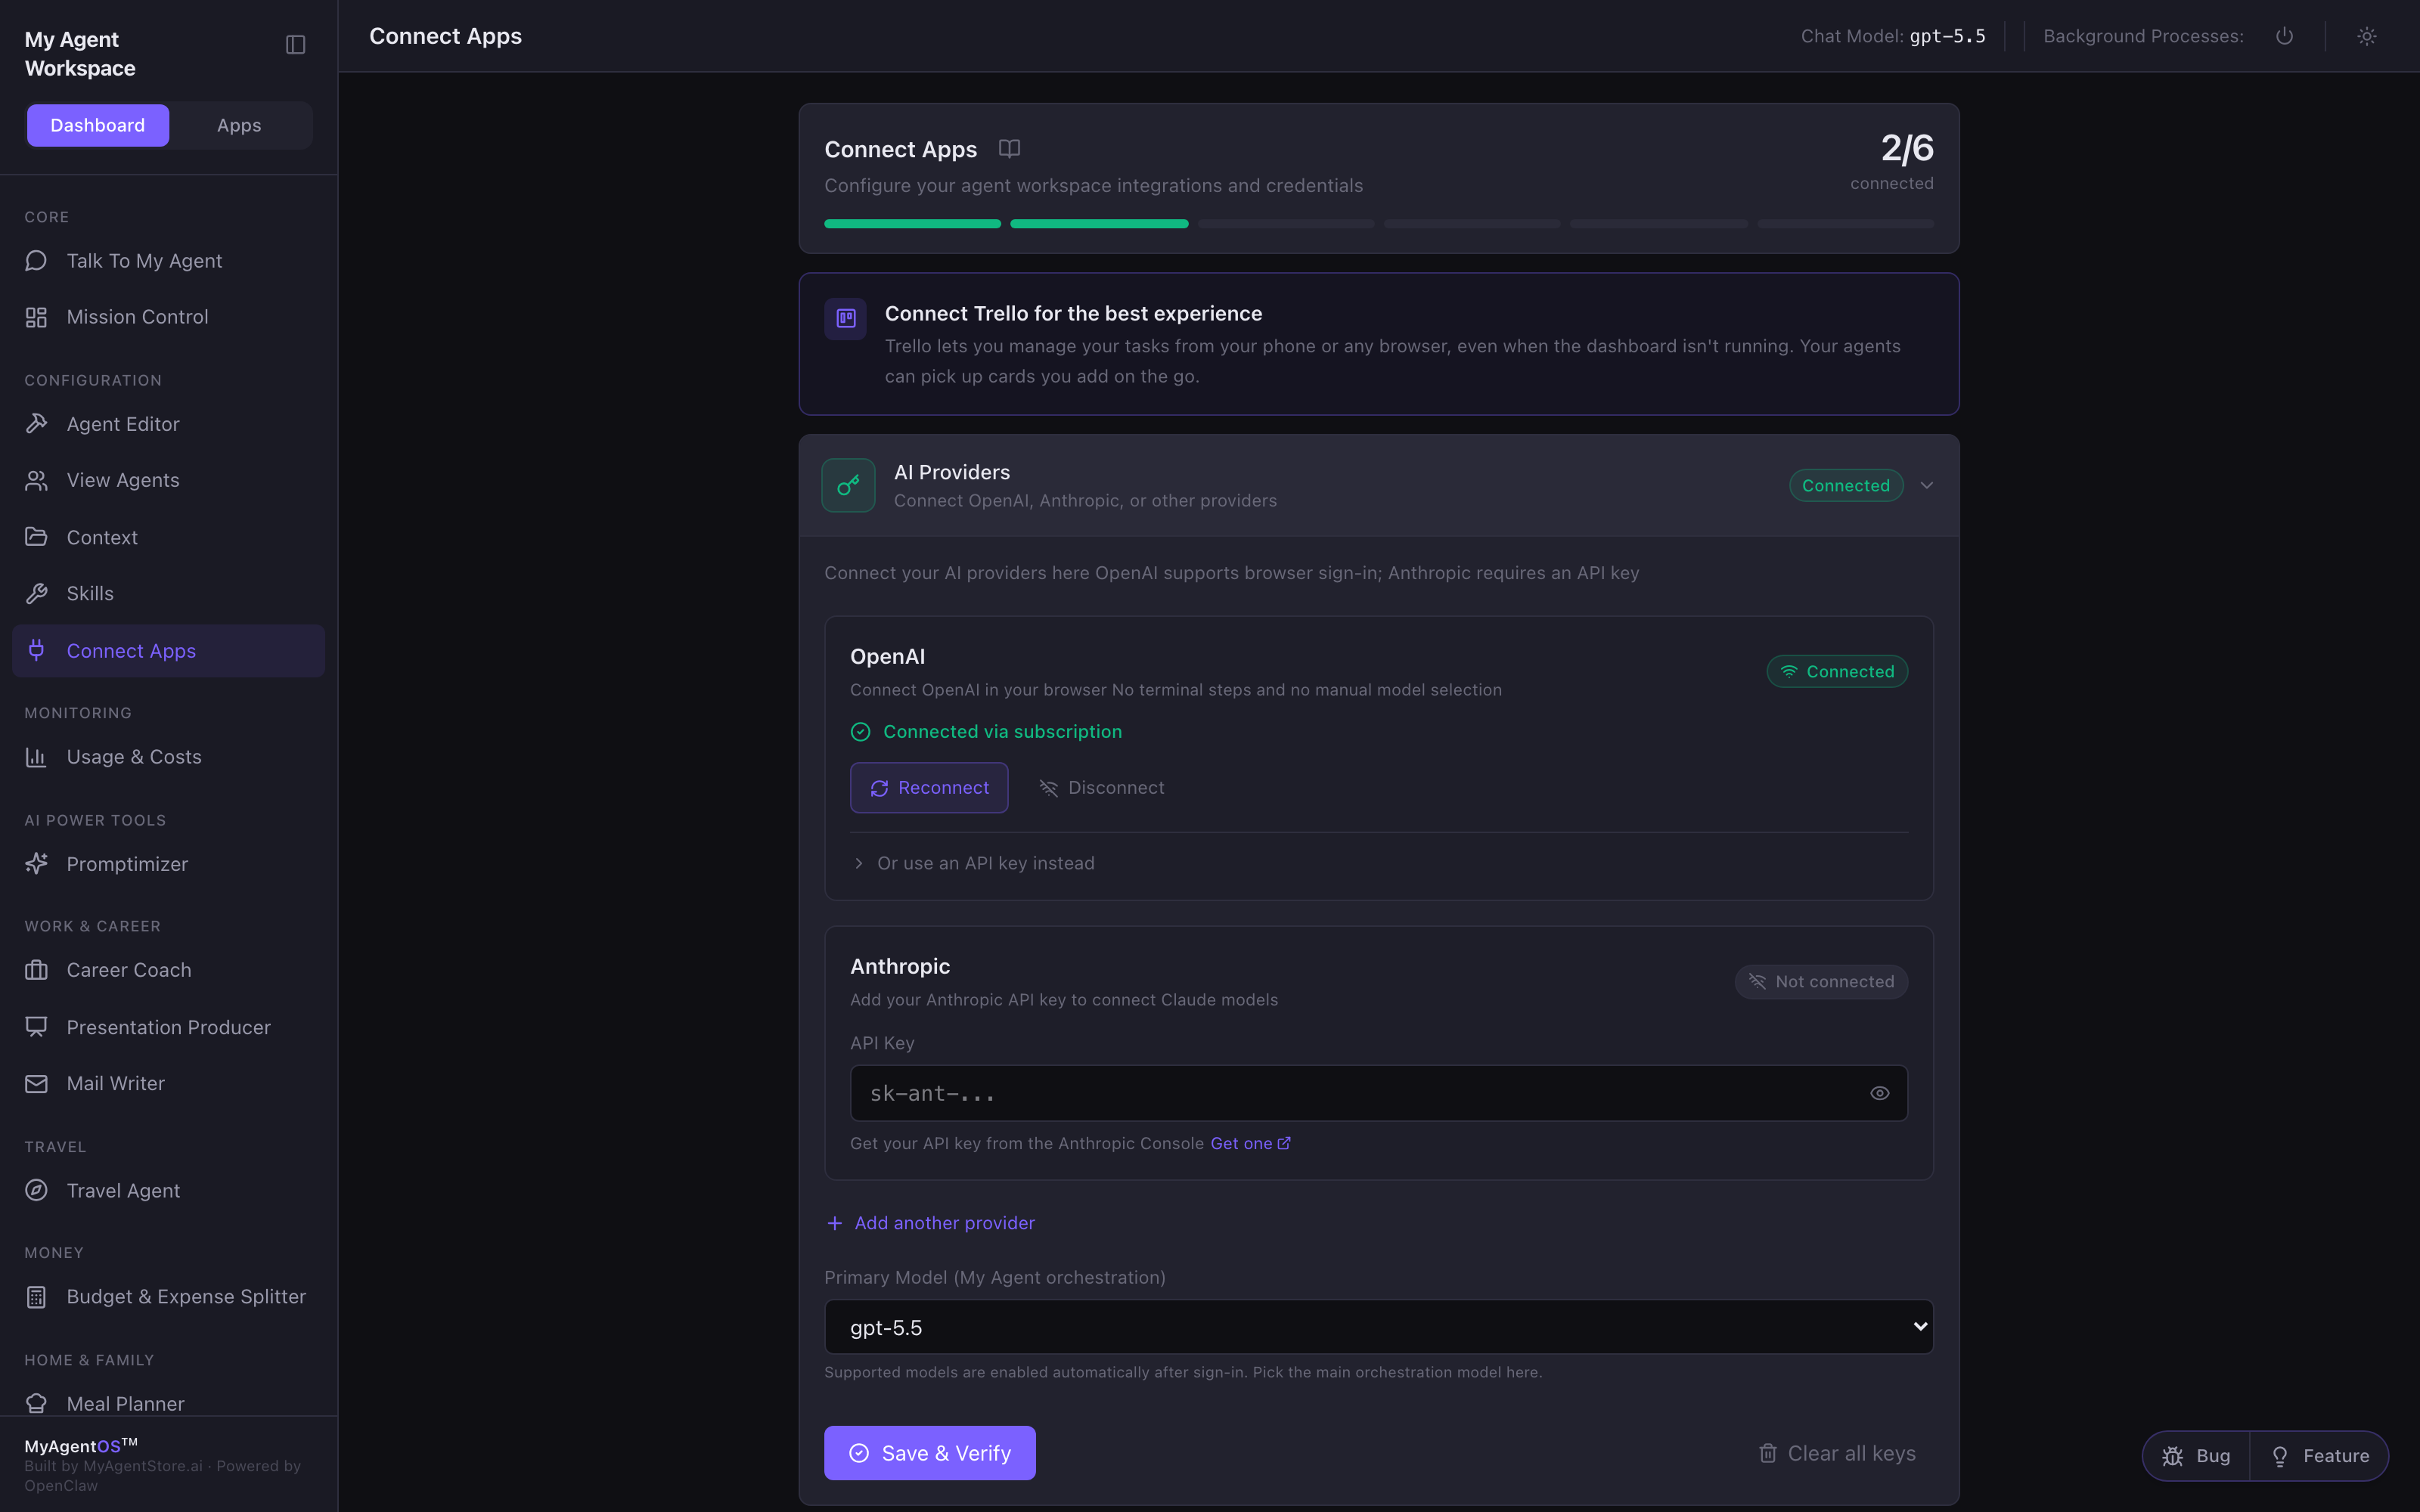
Success looks like: the provider card reads Connected and the "No provider connected" warning clears.
7. Your first task
You are set up. Two good ways to prove it.
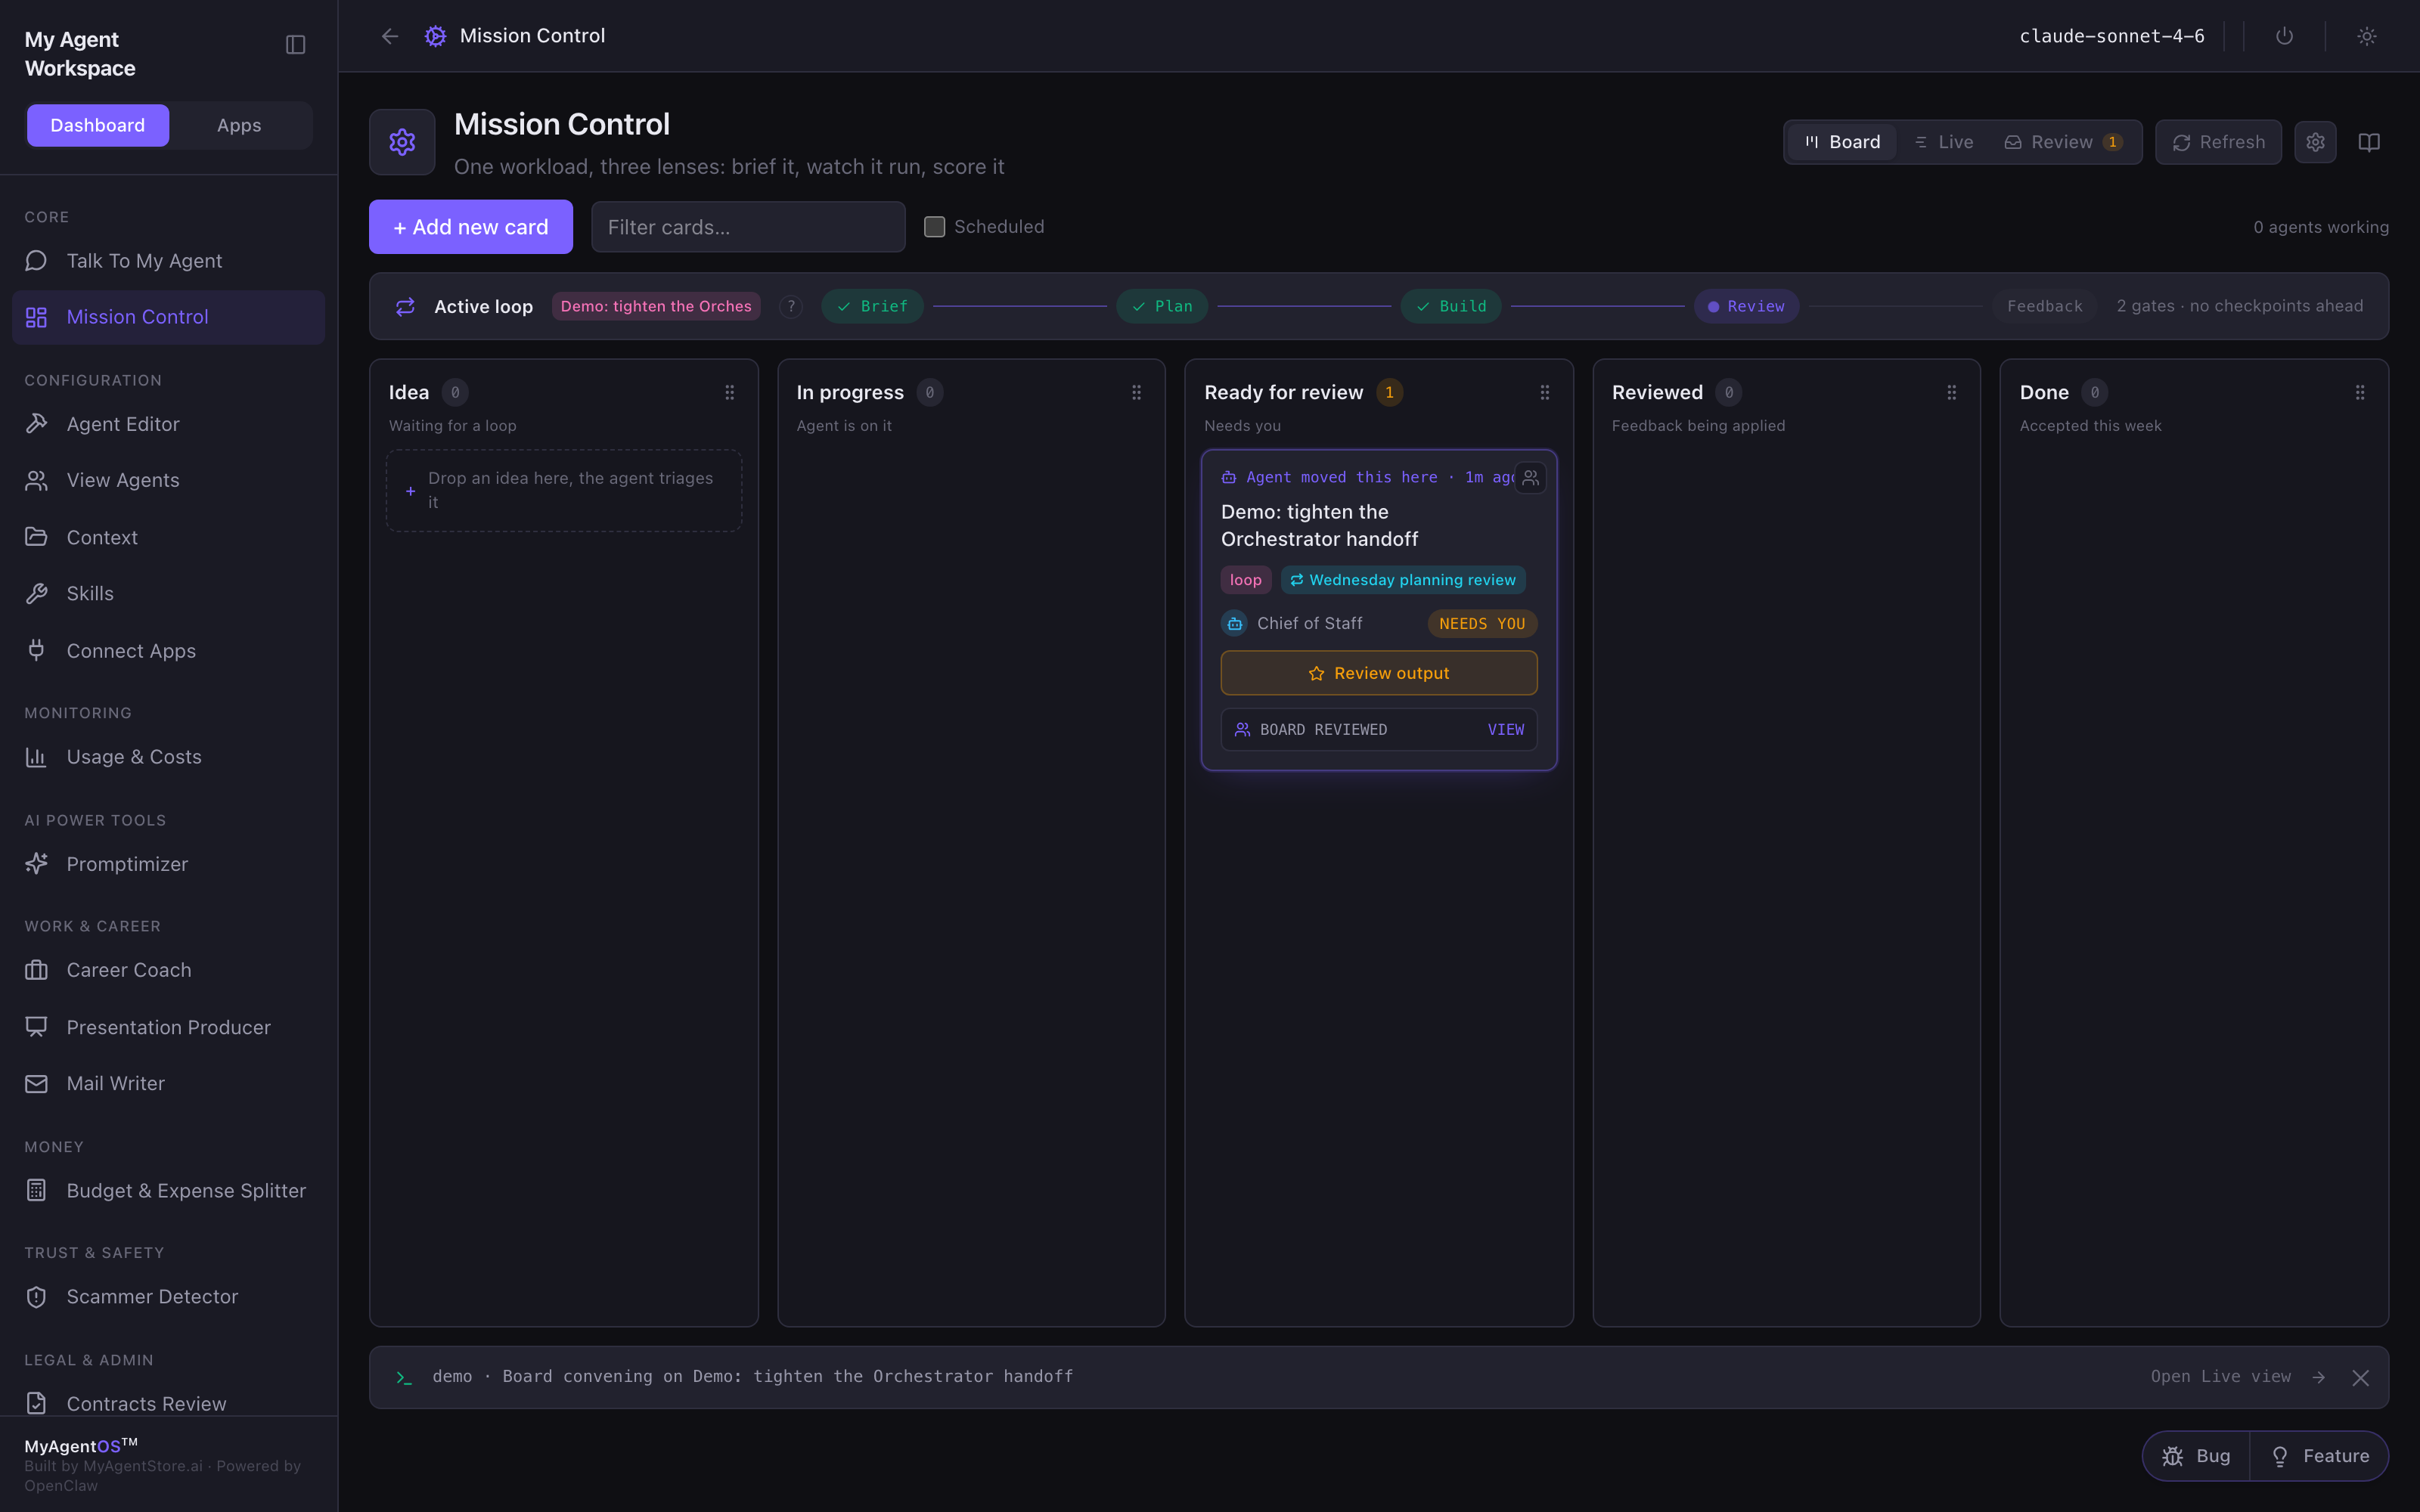
Give your agents a task. Open Mission Control, select Add new card in the idea lane, and type something you actually want looked at, for example "Research whether we should build a mobile app". Drag it into the agent lane and your Chief of Staff agent picks it up and routes it through the pipeline. Research questions work better as a first task than direct instructions: the agents can investigate and come back with options.
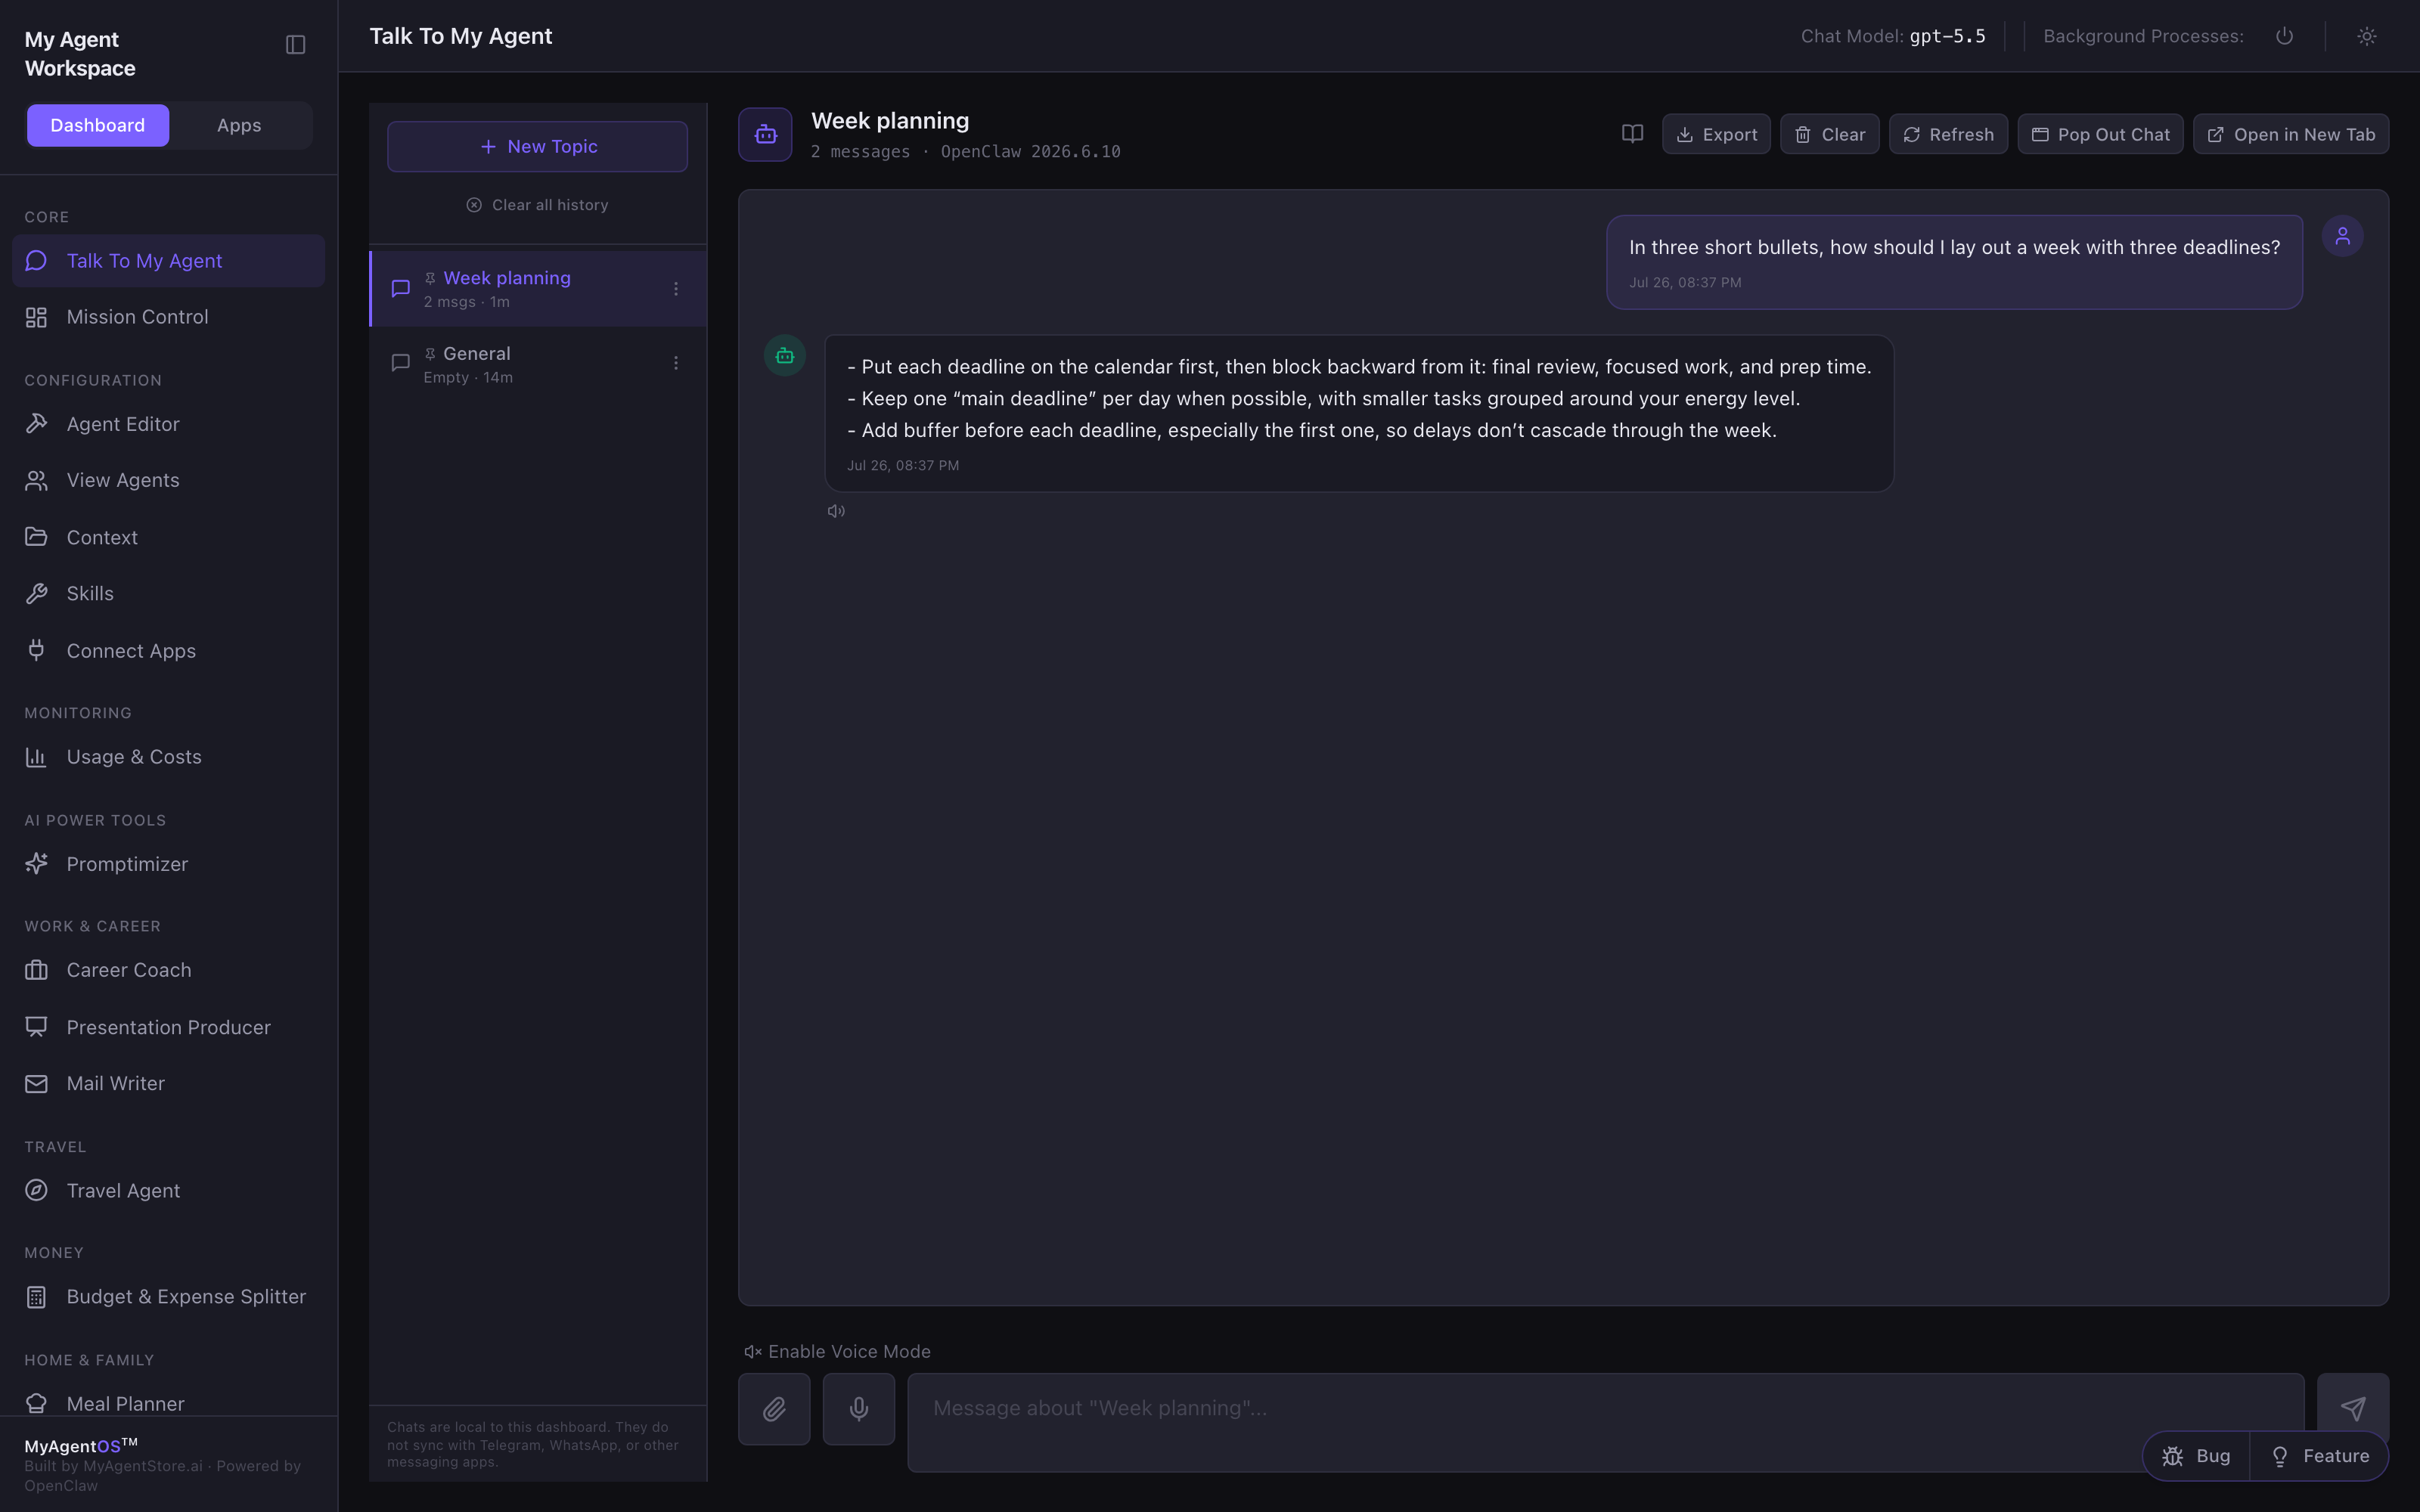
Or just talk to it. Open Talk To My Agent and ask a short, concrete question. A reply in the thread is the simplest possible proof that the install, the token and the provider are all working together.
If you need the Terminal route, or need to start over
The early-access page has an Advanced: install via Terminal, or start over section under the download card. It carries a command-line installer for people who prefer it, and a clean uninstall command for starting from scratch before reinstalling. Both are on that page rather than reproduced here, because the Terminal installer's command carries your own beta code inside it.
Hit something this guide does not cover? Tell us what you did and what happened, through Send Feedback on the early-access page or at support@myagentstore.ai.