Getting started: Mac app
Enter your invitation code, download the signed installer, and run it. The Mac app installs to your Documents folder and opens at localhost. There is no account and no password: on your own machine, the dashboard answers only to you.
The Mac app runs MyAgentOS entirely on your own machine. You download a signed,
notarised installer, it sets everything up in your Documents folder, and the
dashboard opens in your browser at localhost:3002. Nothing about you leaves the
Mac: there is no account to create and no password to remember, because the
dashboard only answers to your own machine.
Who it is for: anyone who wants MyAgentOS on their own Mac rather than in the cloud. If you would rather we run it for you, see Getting started: Hosted instead.
Watch first: getting-started-mac.mp4 (captions toggleable in your player, or load getting-started-mac.srt). The screen is a real recording of the live website and the product, and the installer steps are the real clean-room installer; the narration is an AI-generated voice.
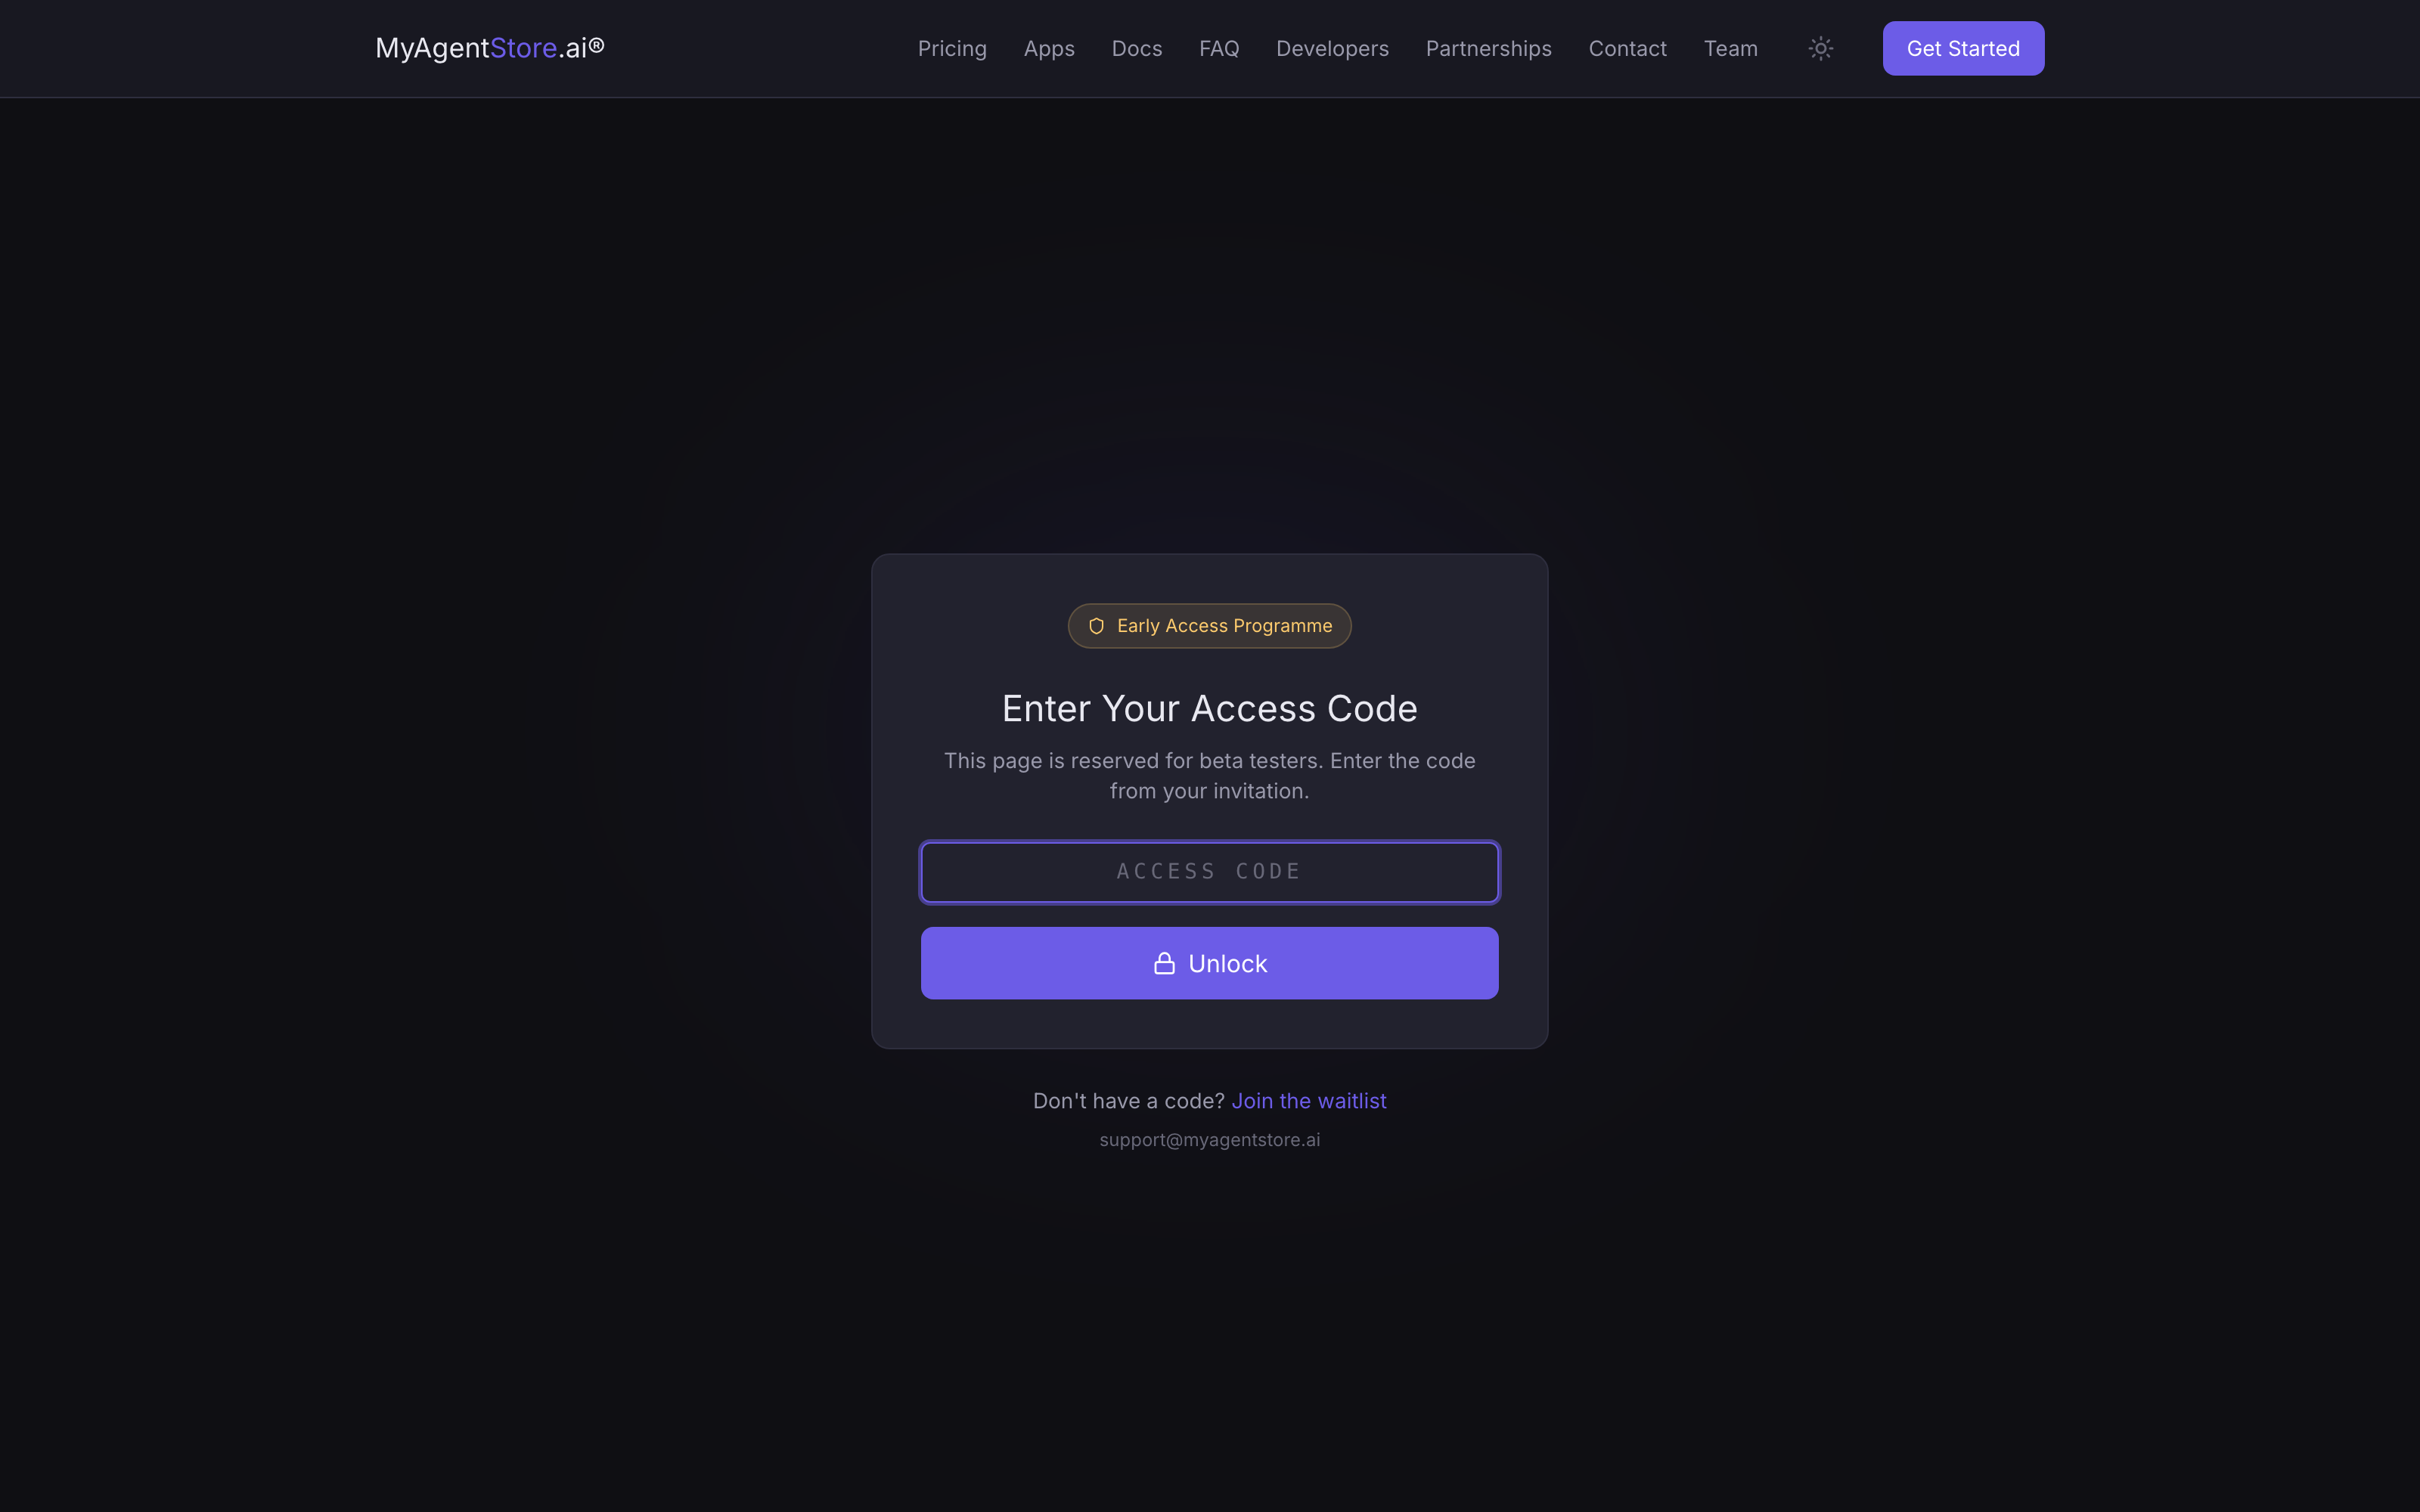
1. Download the installer
The Mac app is in closed beta, so the download sits behind an access gate. On the early-access page, enter the code from your invitation email and select Unlock.
Once unlocked, the Mac Installer (DMG) card gives you the download: select Download MyAgentOS-Installer.dmg. The installer is signed and notarised by Apple, so macOS opens it without a Gatekeeper warning.
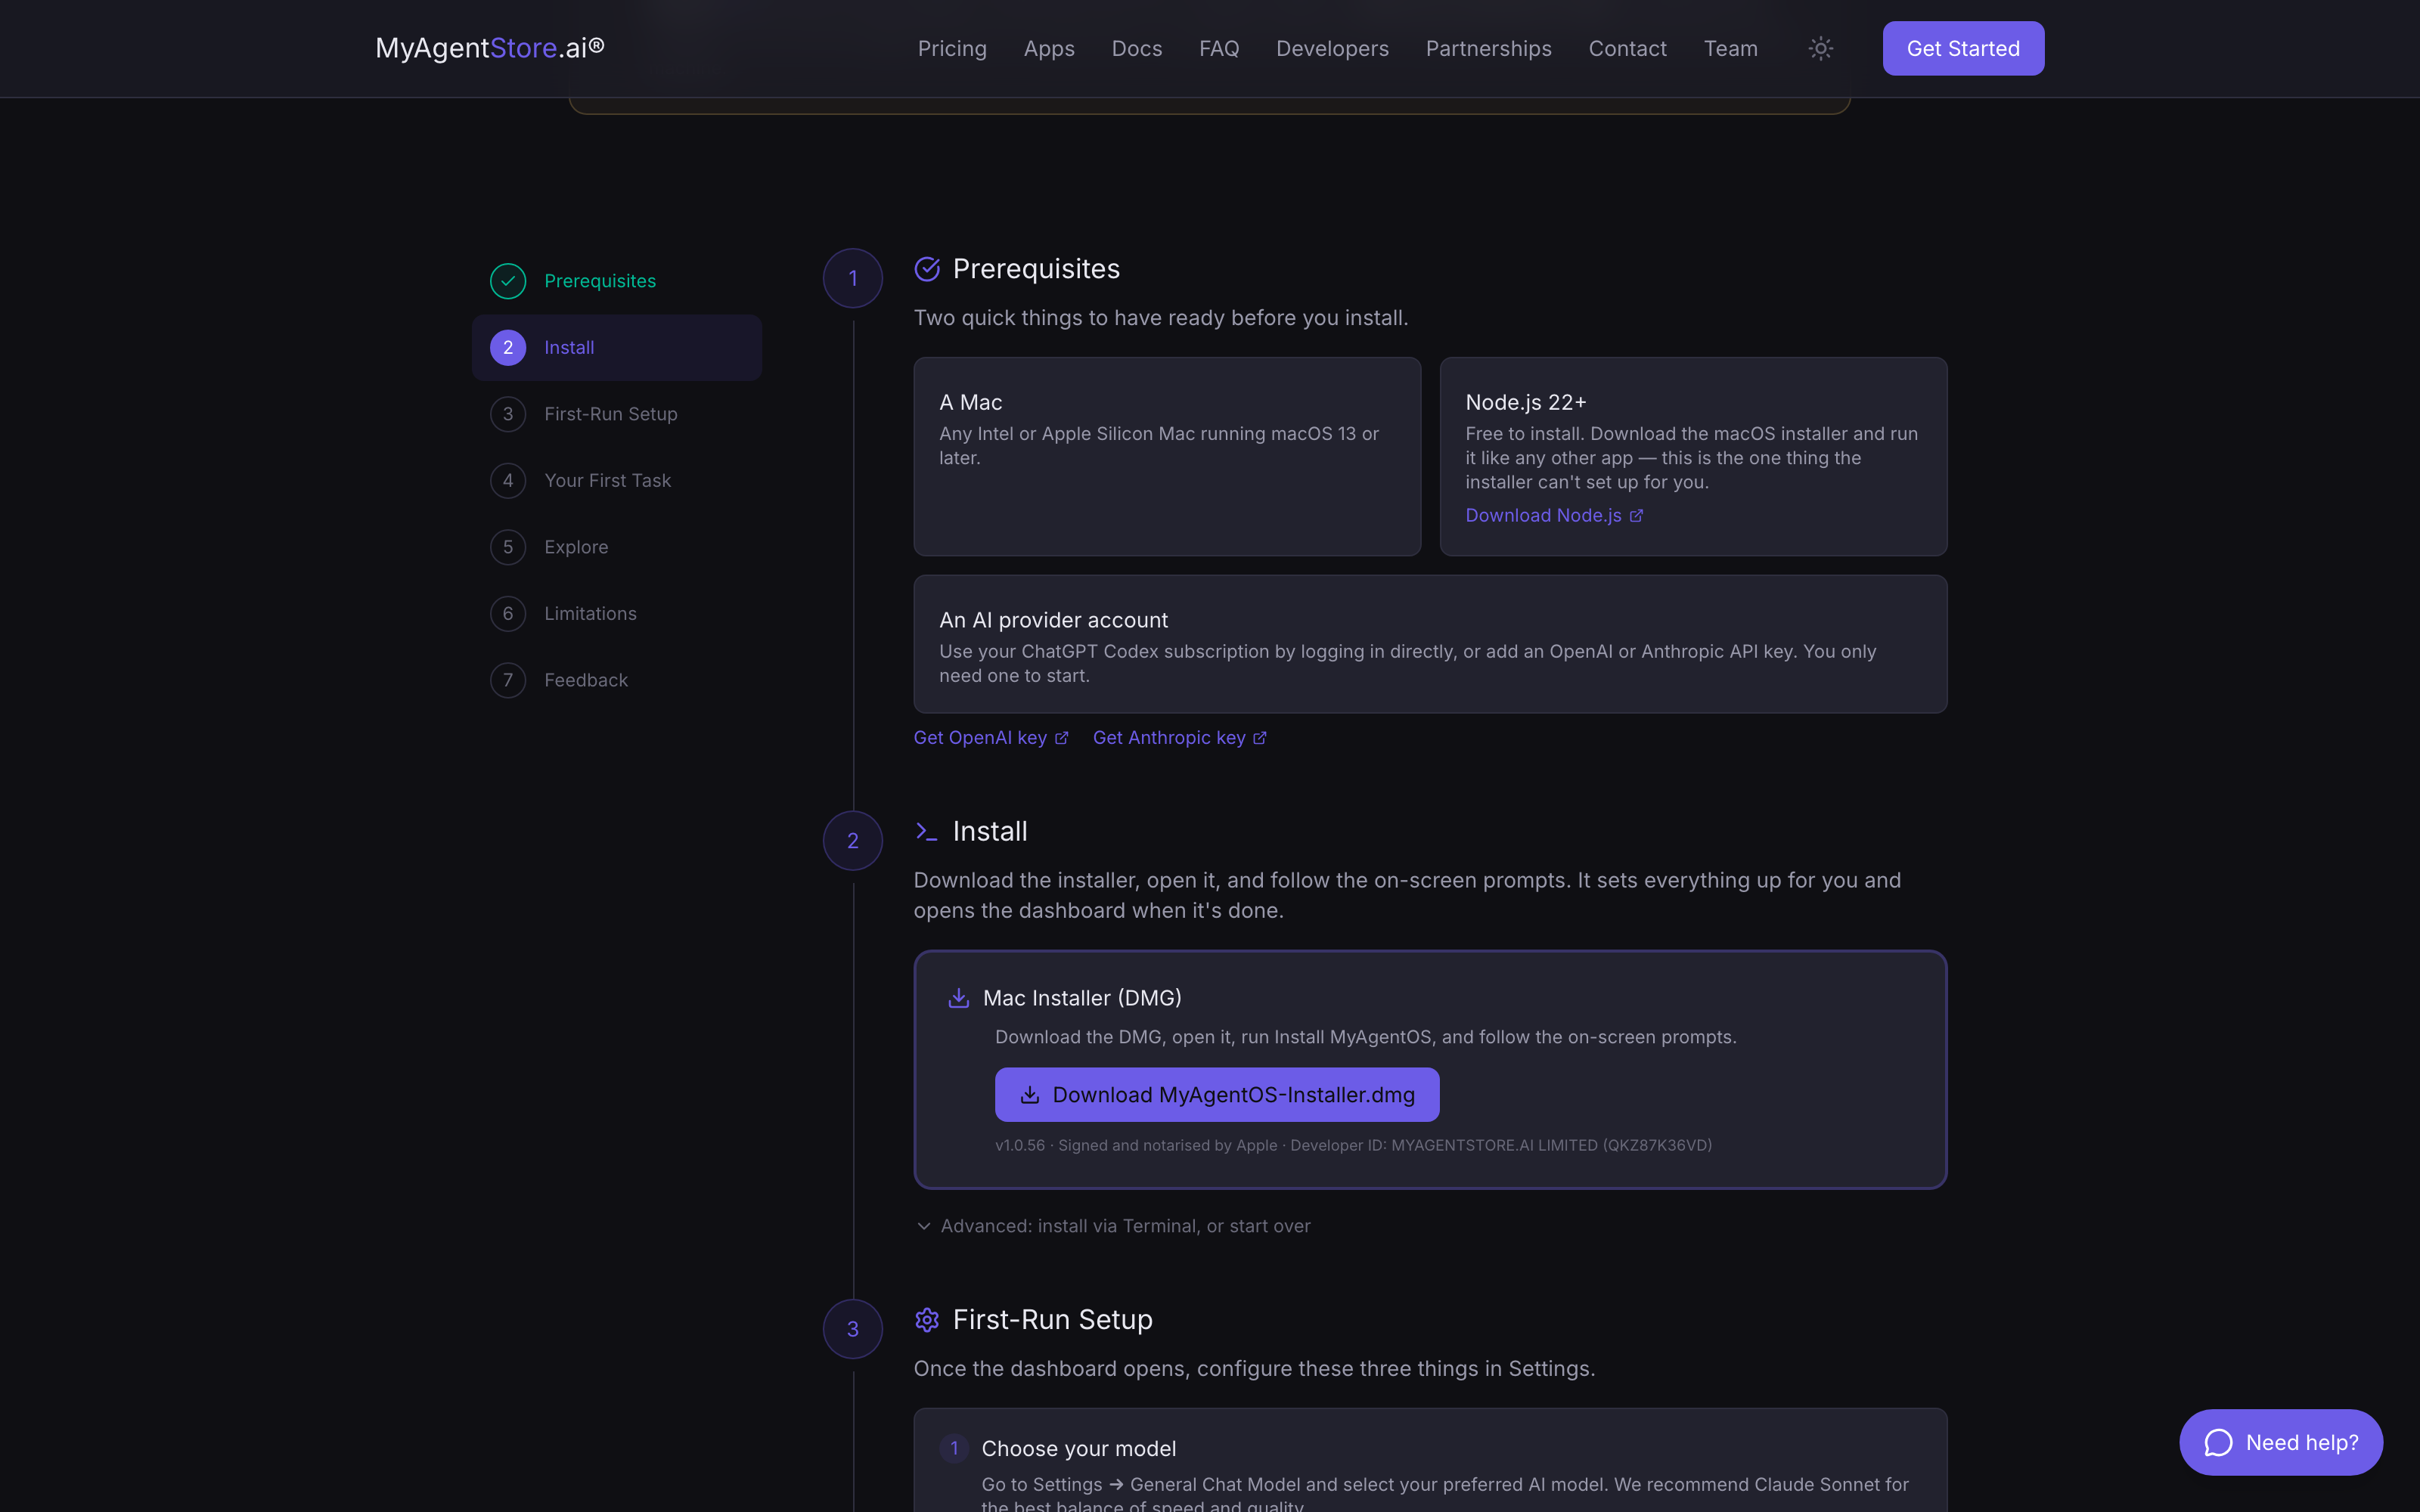
One prerequisite the installer cannot handle for you: a recent Node.js (22 or later). The early-access page links straight to it.
2. Run the installer
Open the downloaded disk image and run Install MyAgentOS. The installer walks through four steps:
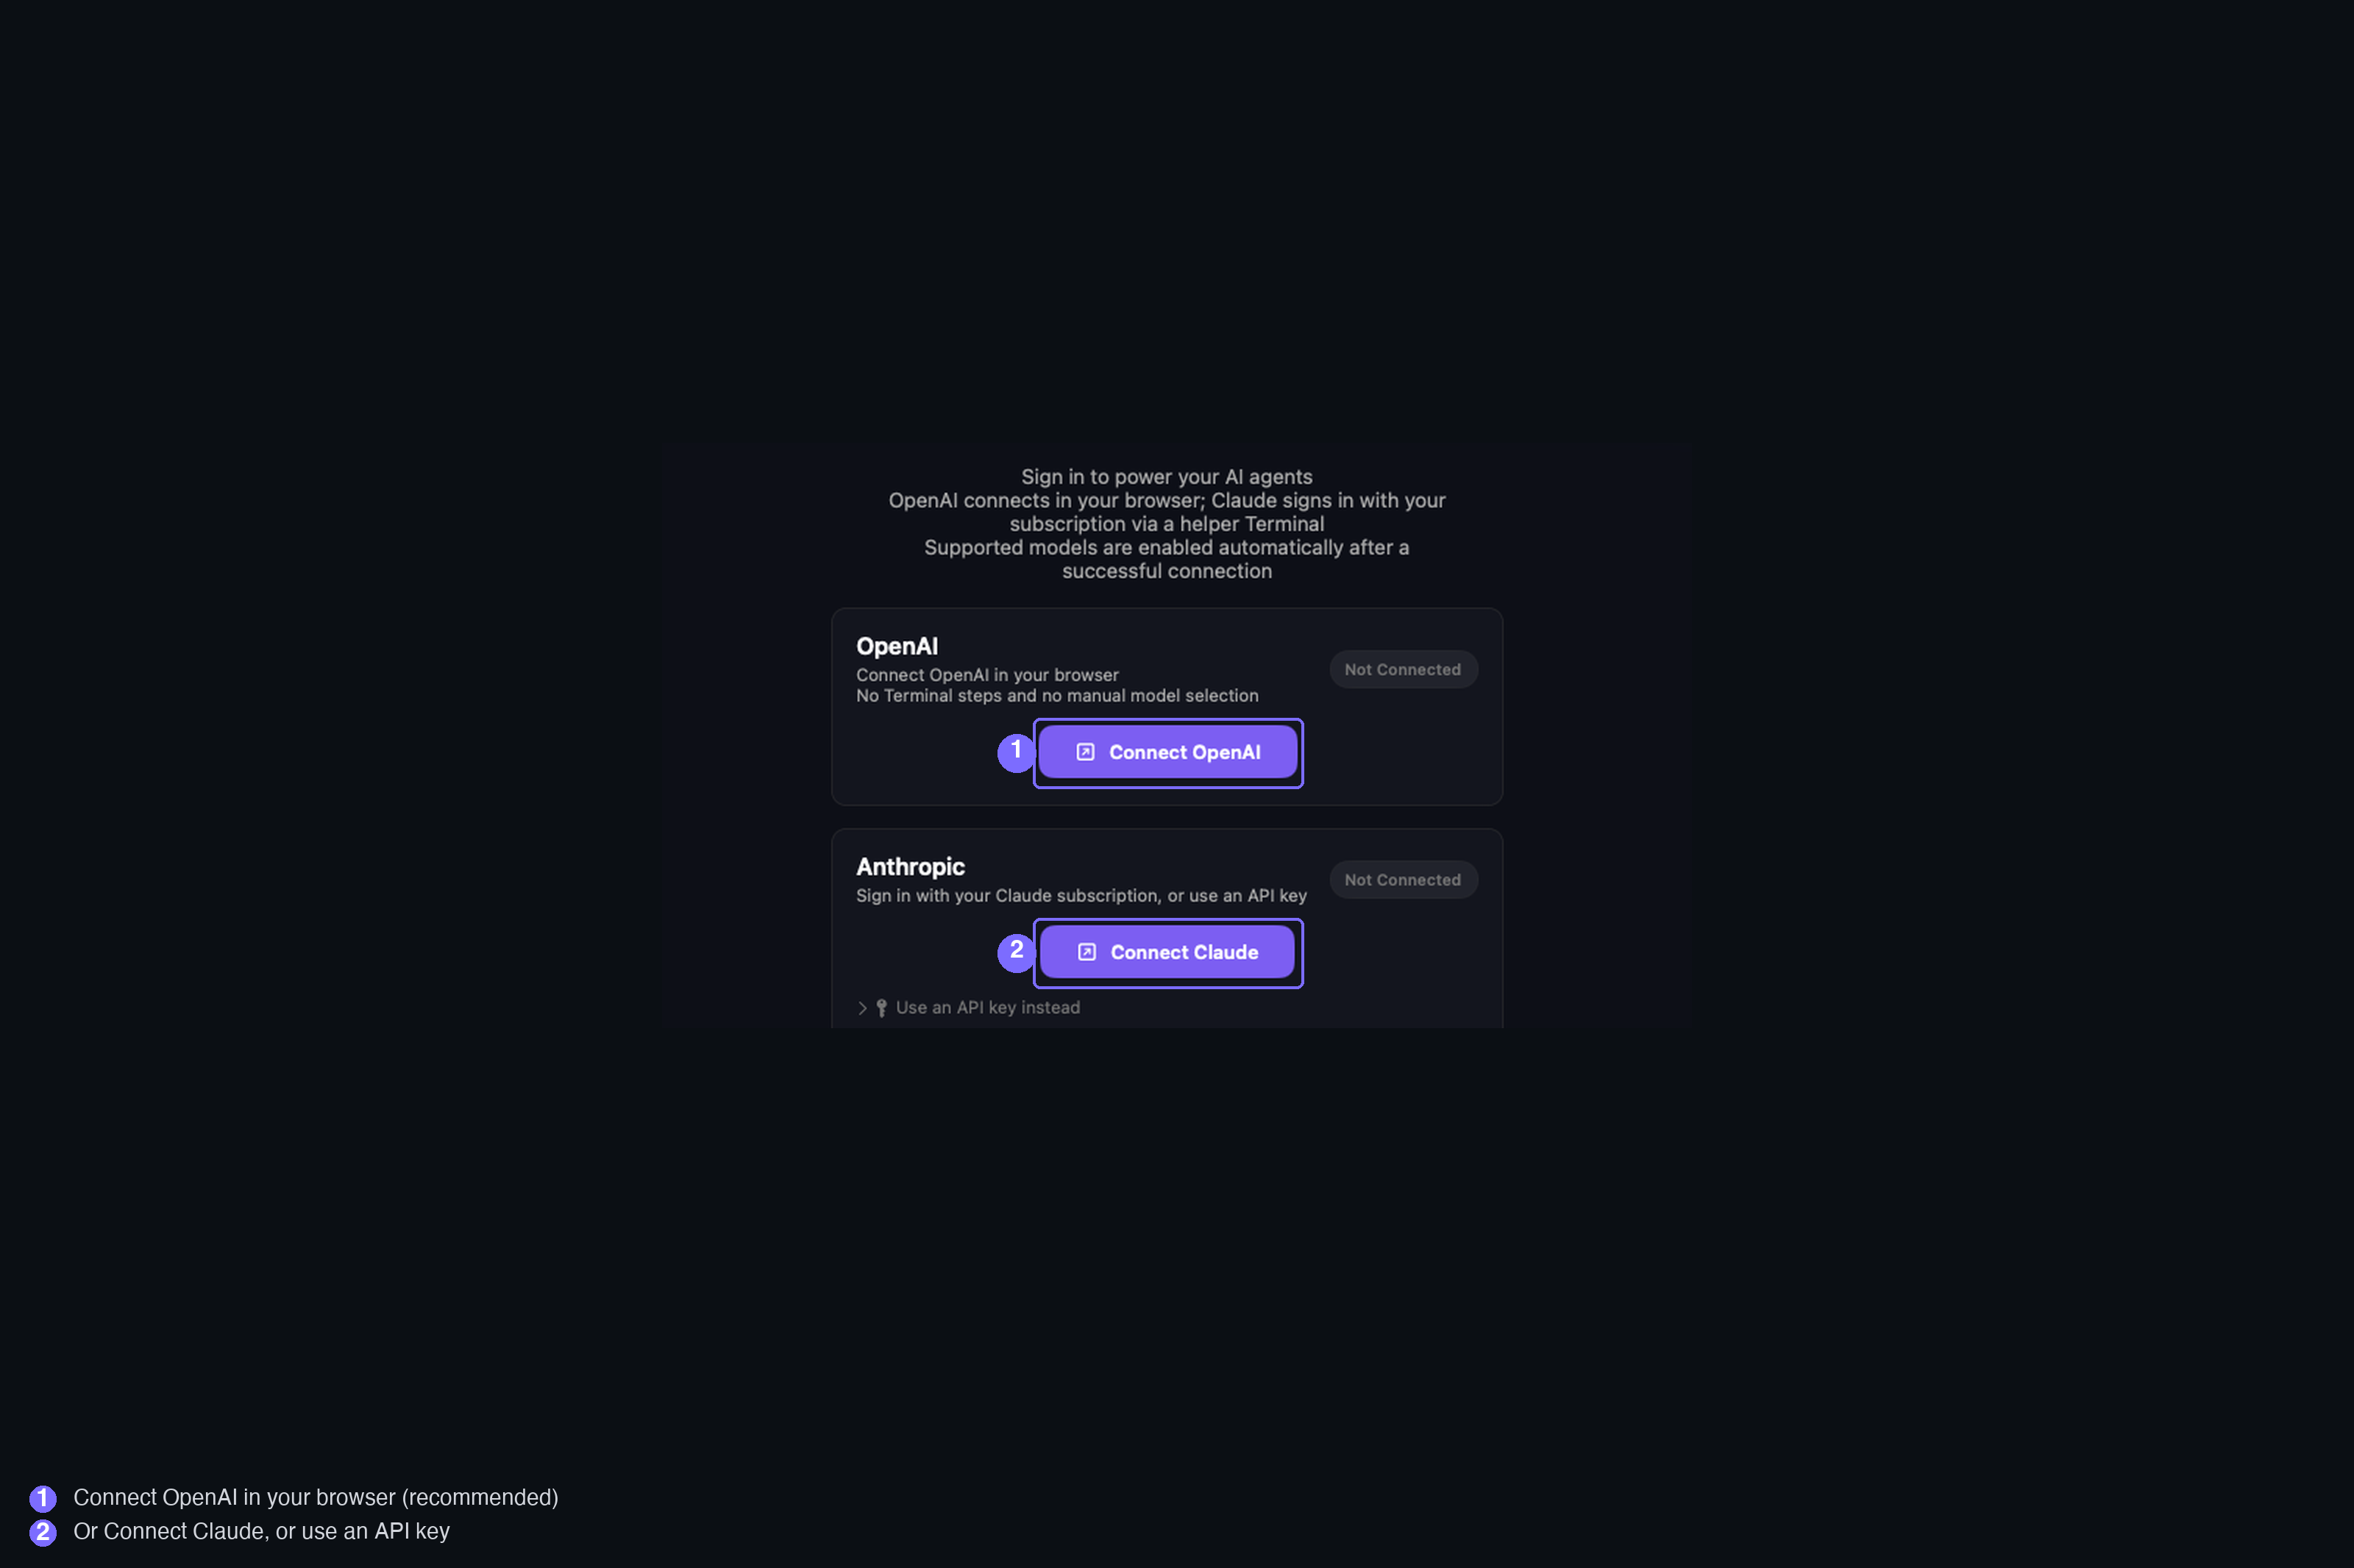
- Welcome. A short intro that notes the dashboard opens at
localhost:3002. Select Install to begin. - Installing. It verifies the signed payload ("Verifying payload signature"),
then installs MyAgentOS into
~/Documents/MyAgentOS. - Provider. Connect an API Provider: connect OpenAI in your browser, or connect Claude, or paste an API key. You can also do this later in the dashboard, so Skip for now is fine if you would rather connect there.
- Complete. "Installation Complete". If a dashboard token was created, this
step shows it under Dashboard Token Required and asks you to save it
somewhere safe: you will usually only need it once per browser, and again only
if you switch browser or device. Select Open Dashboard to open
localhost:3002.
3. First run
On your own Mac, opening localhost:3002 usually takes you straight in: the
dashboard trusts a request from your own machine, so there is nothing to sign in
with. From another browser on the same Mac, or from another device on your
network, it asks once for the dashboard token the installer gave you.
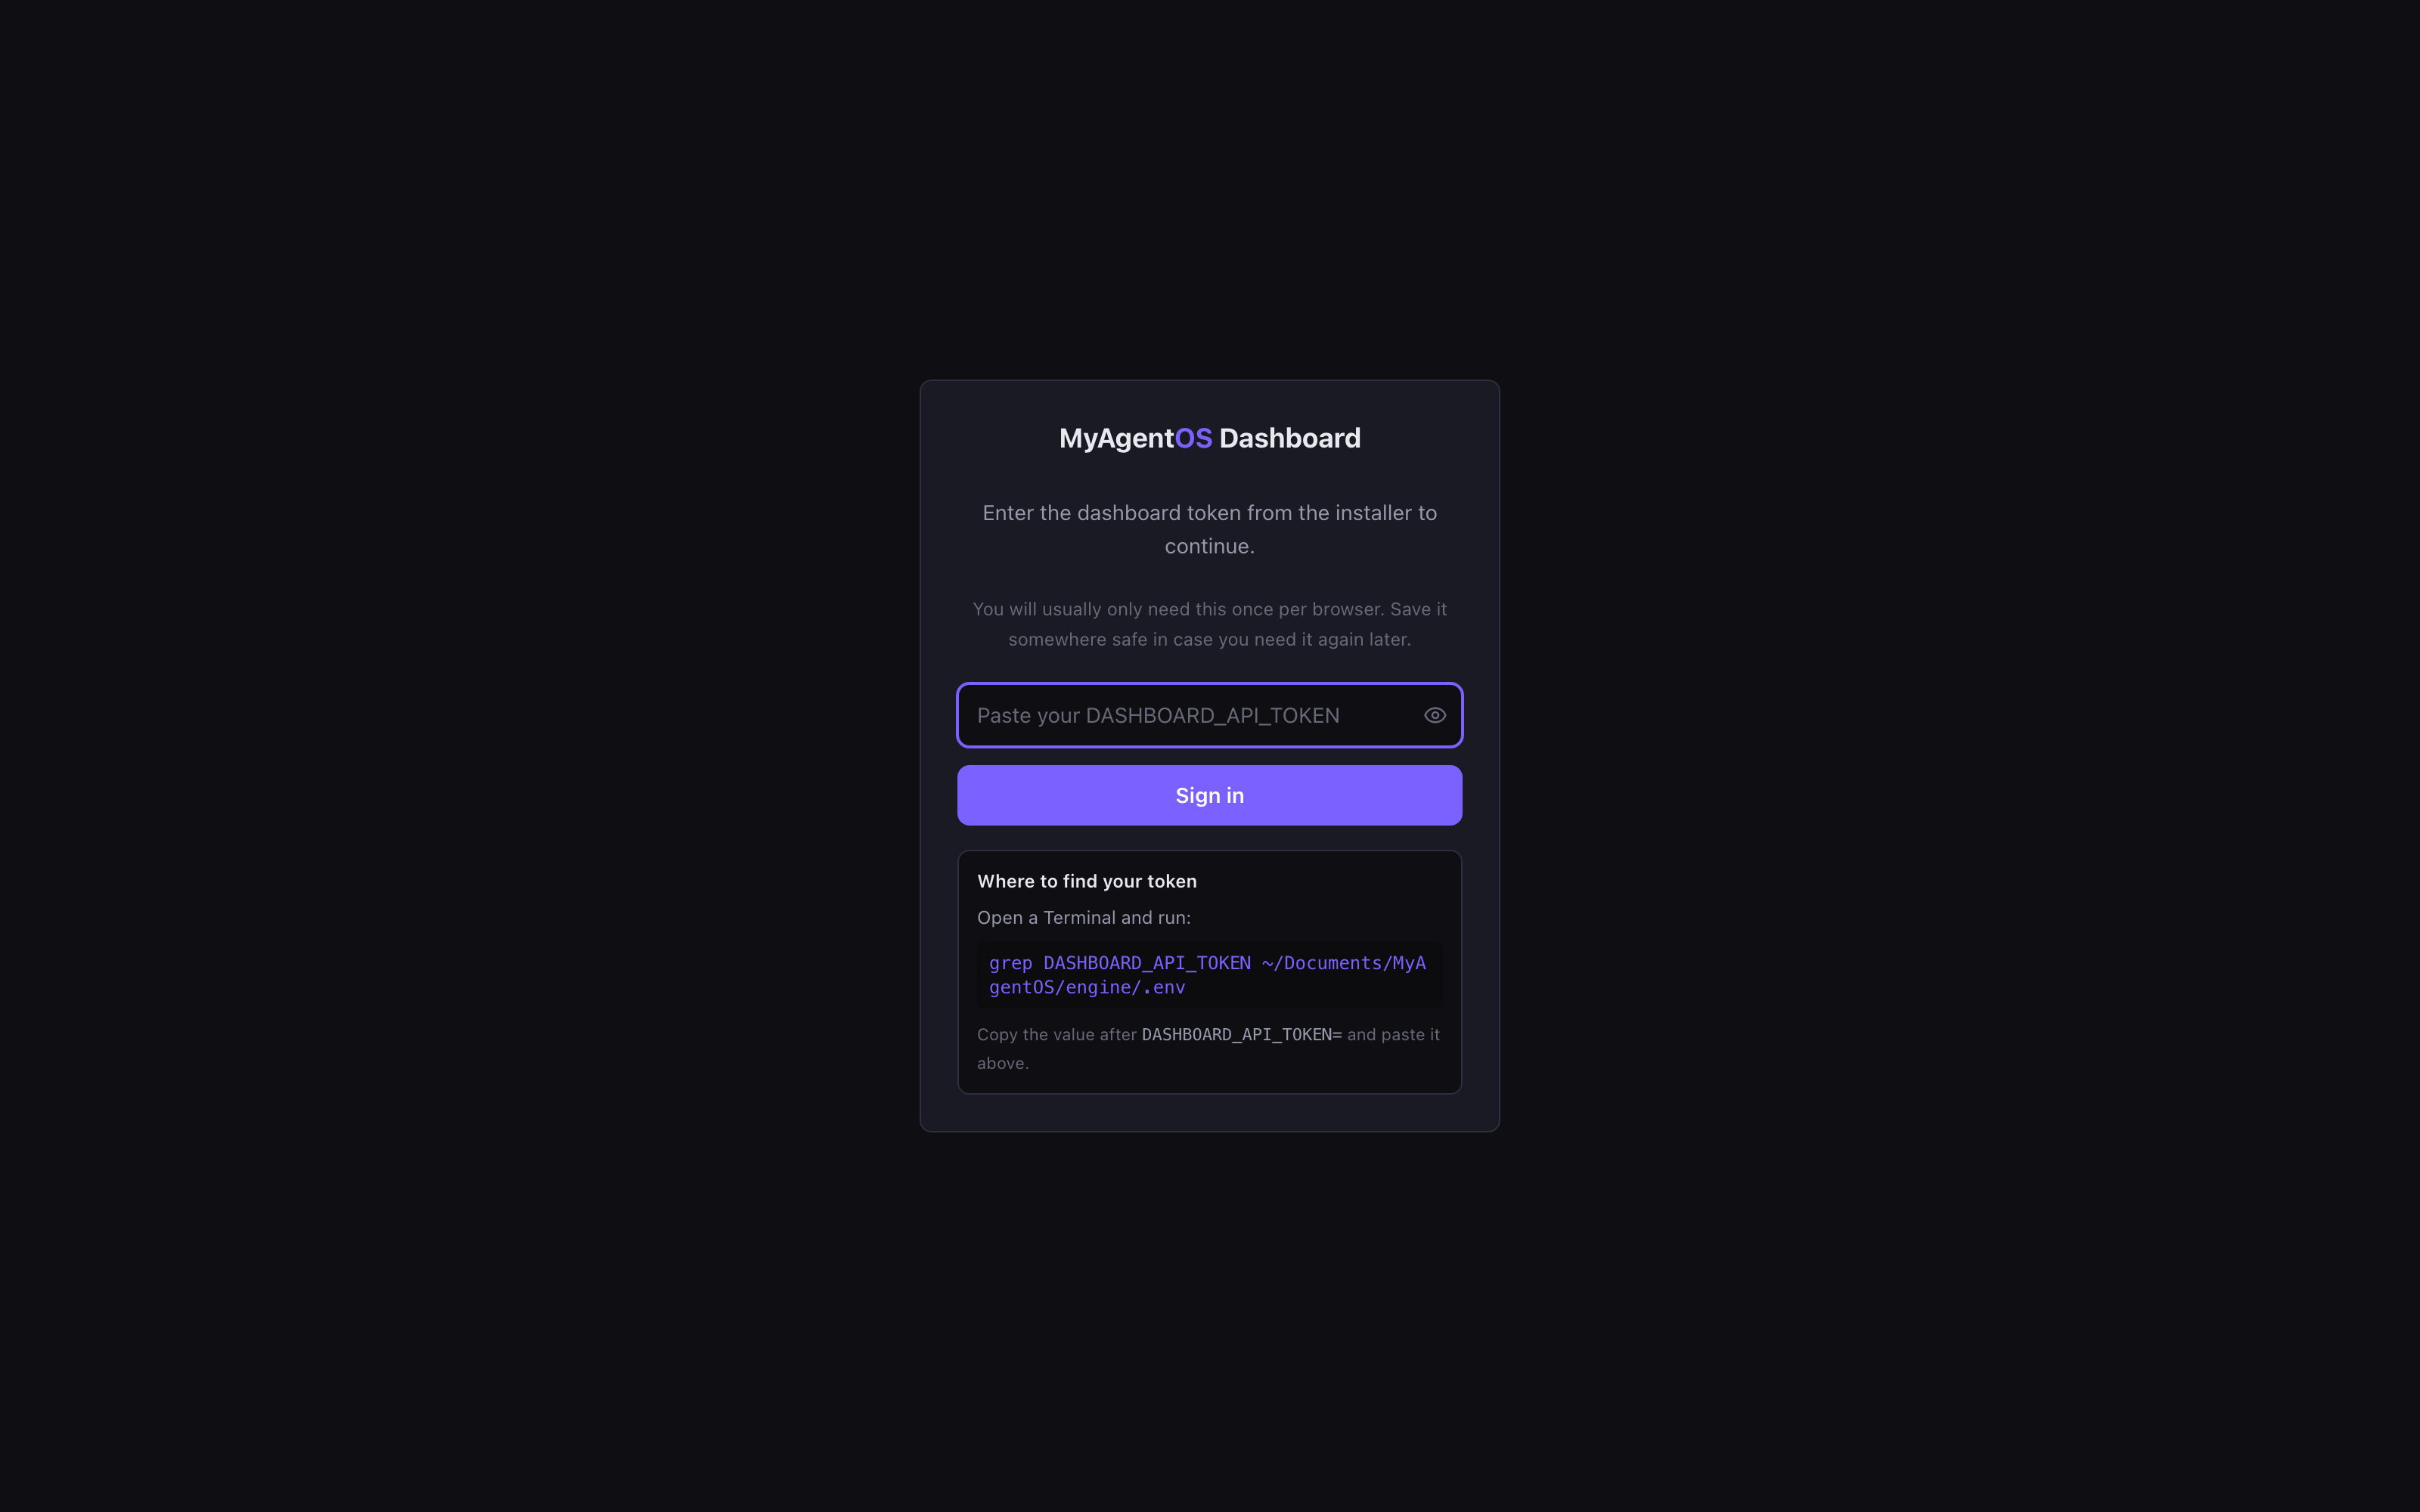
The sign-in screen tells you where to find that token, and the
Connecting your AI guide has the full walkthrough
(open Terminal, run grep DASHBOARD_API_TOKEN ~/Documents/MyAgentOS/engine/.env,
and paste the value). Paste it and select Sign in.
Either way you land on the dashboard, and the top bar shows No provider connected until you connect an AI. There is no account and no password to set: on your own machine, the dashboard answers only to you.
4. Connect your AI, and you are ready
The last step is to connect a provider. Open Connect Apps from the sidebar and, under AI Providers, either Connect OpenAI with a browser sign-in or paste an Anthropic API key. It is the same two routes as on the hosted version; the full walkthrough, including the other providers, is on Connecting your AI.
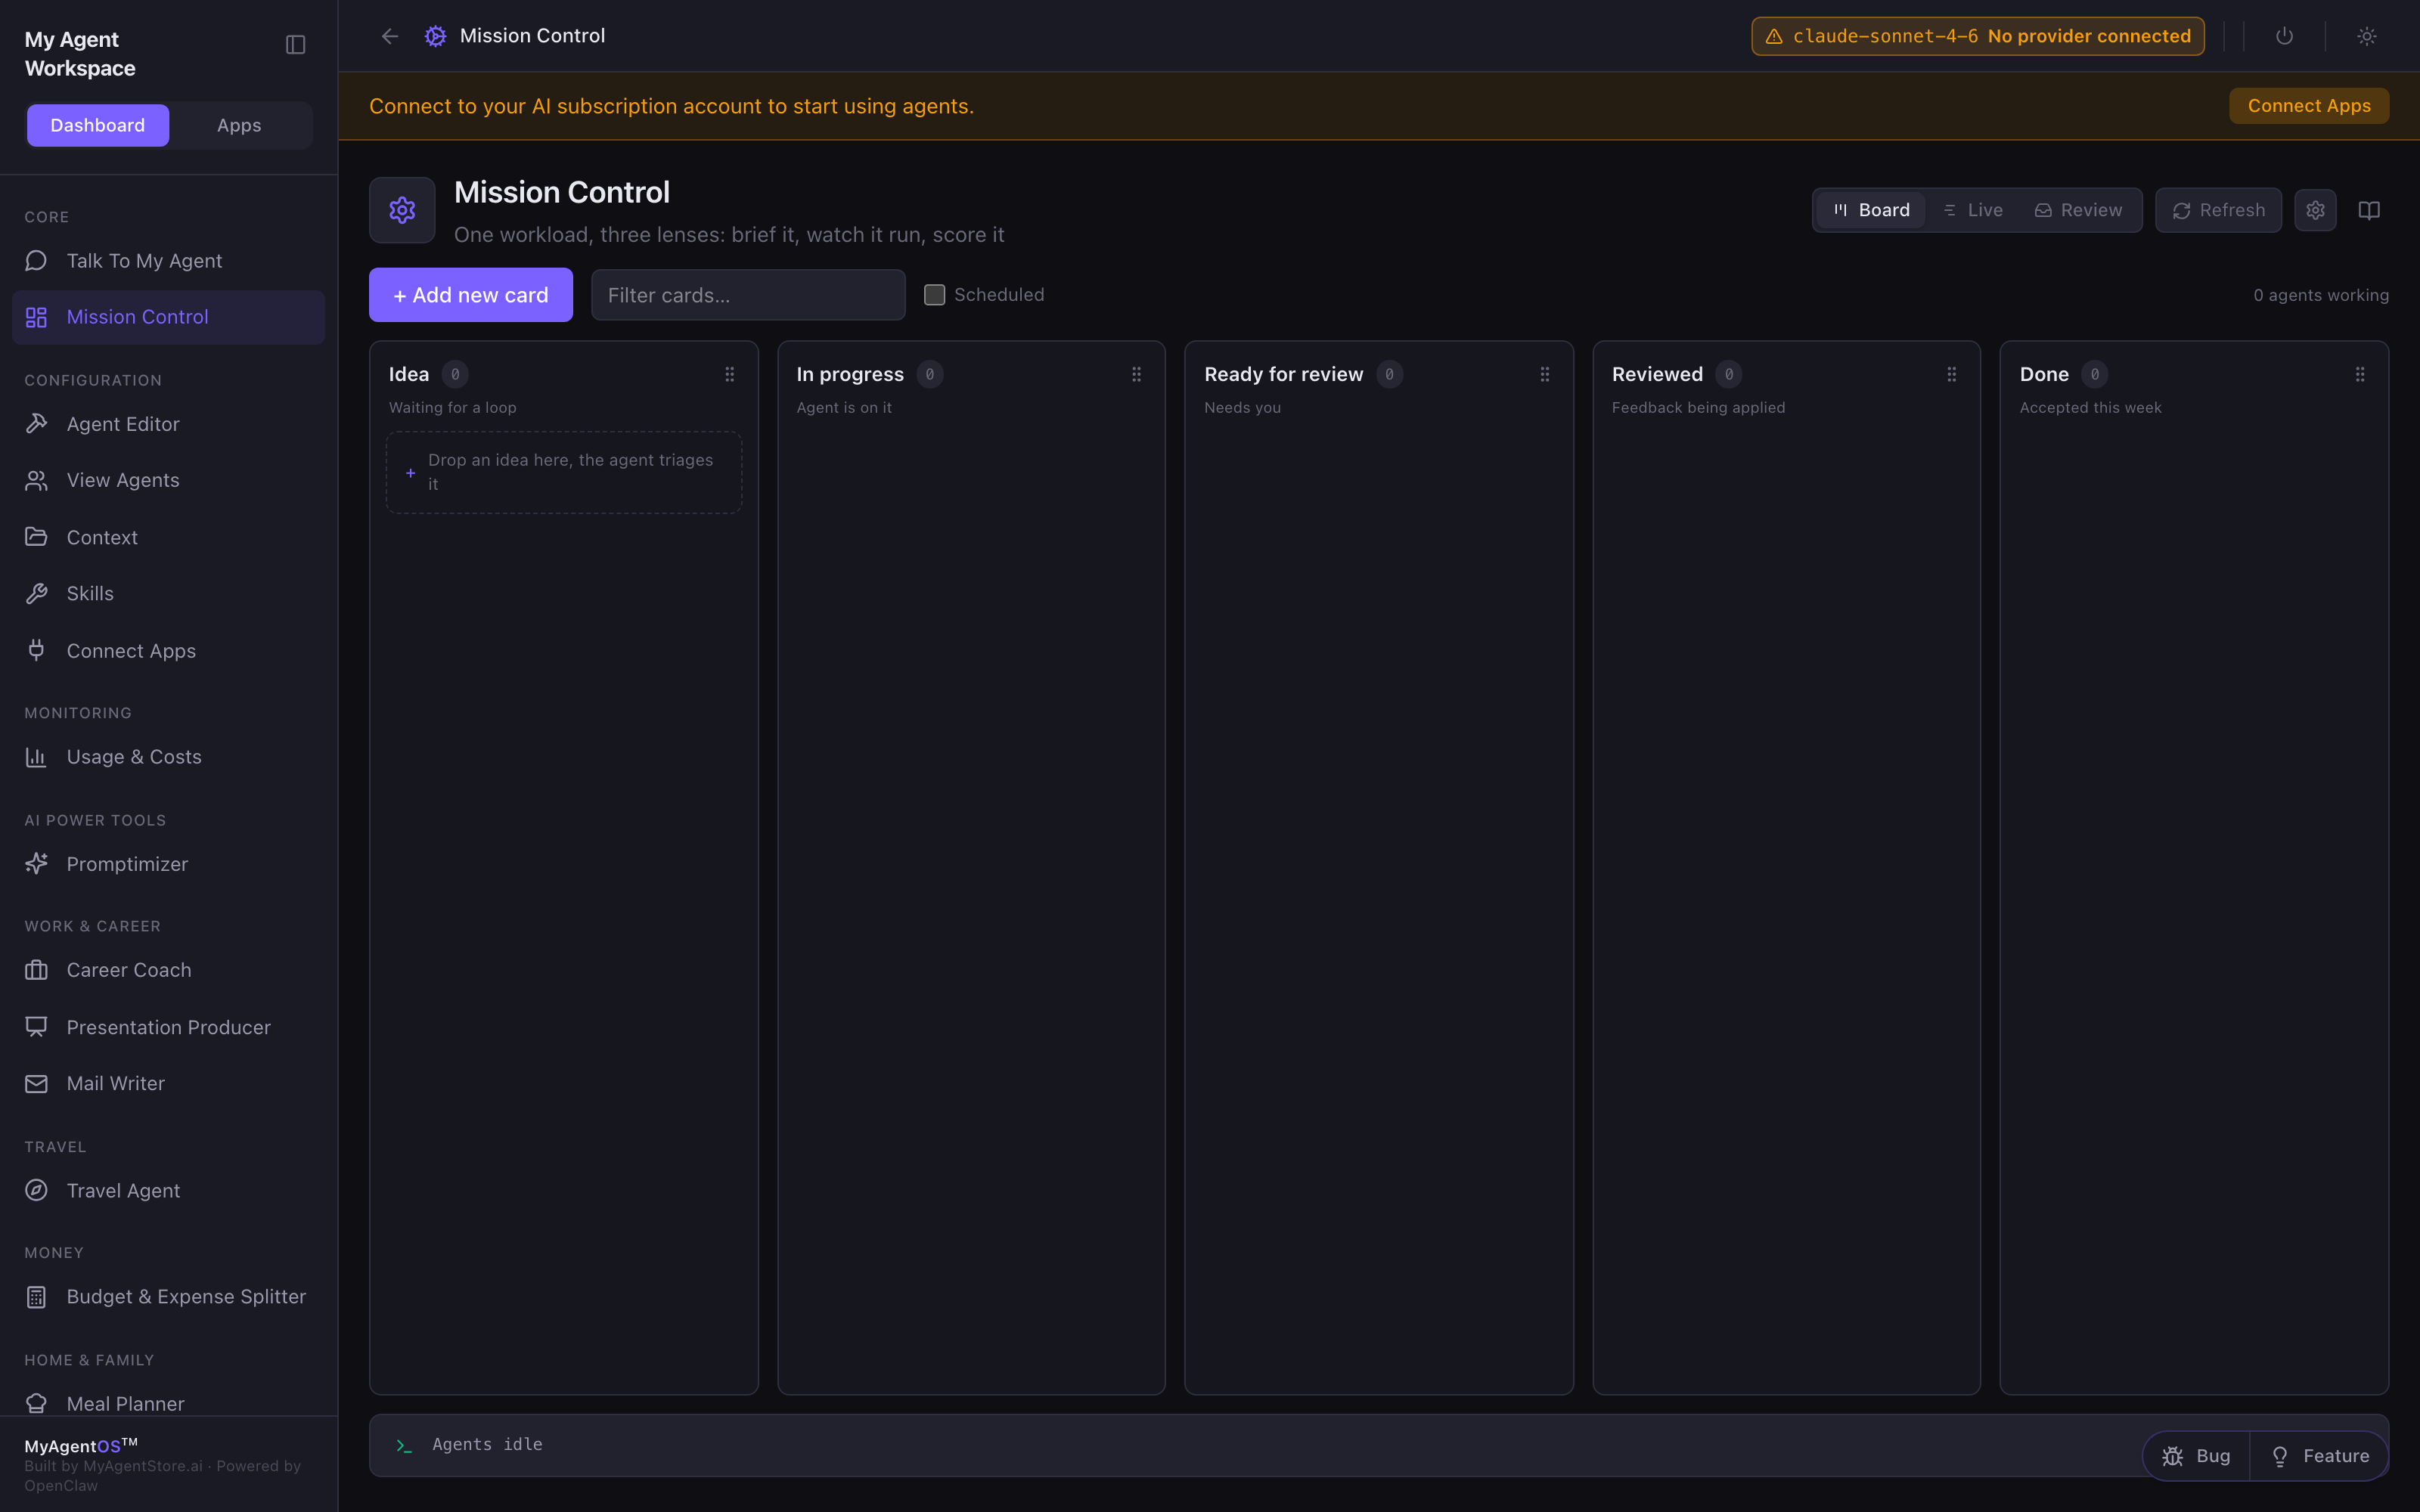
That is the whole setup. Everything lives in ~/Documents/MyAgentOS on your
machine, localhost trusts only your own Mac, and once a provider is connected
the whole dashboard comes to life.